TSPROF Kadet Sharpening System

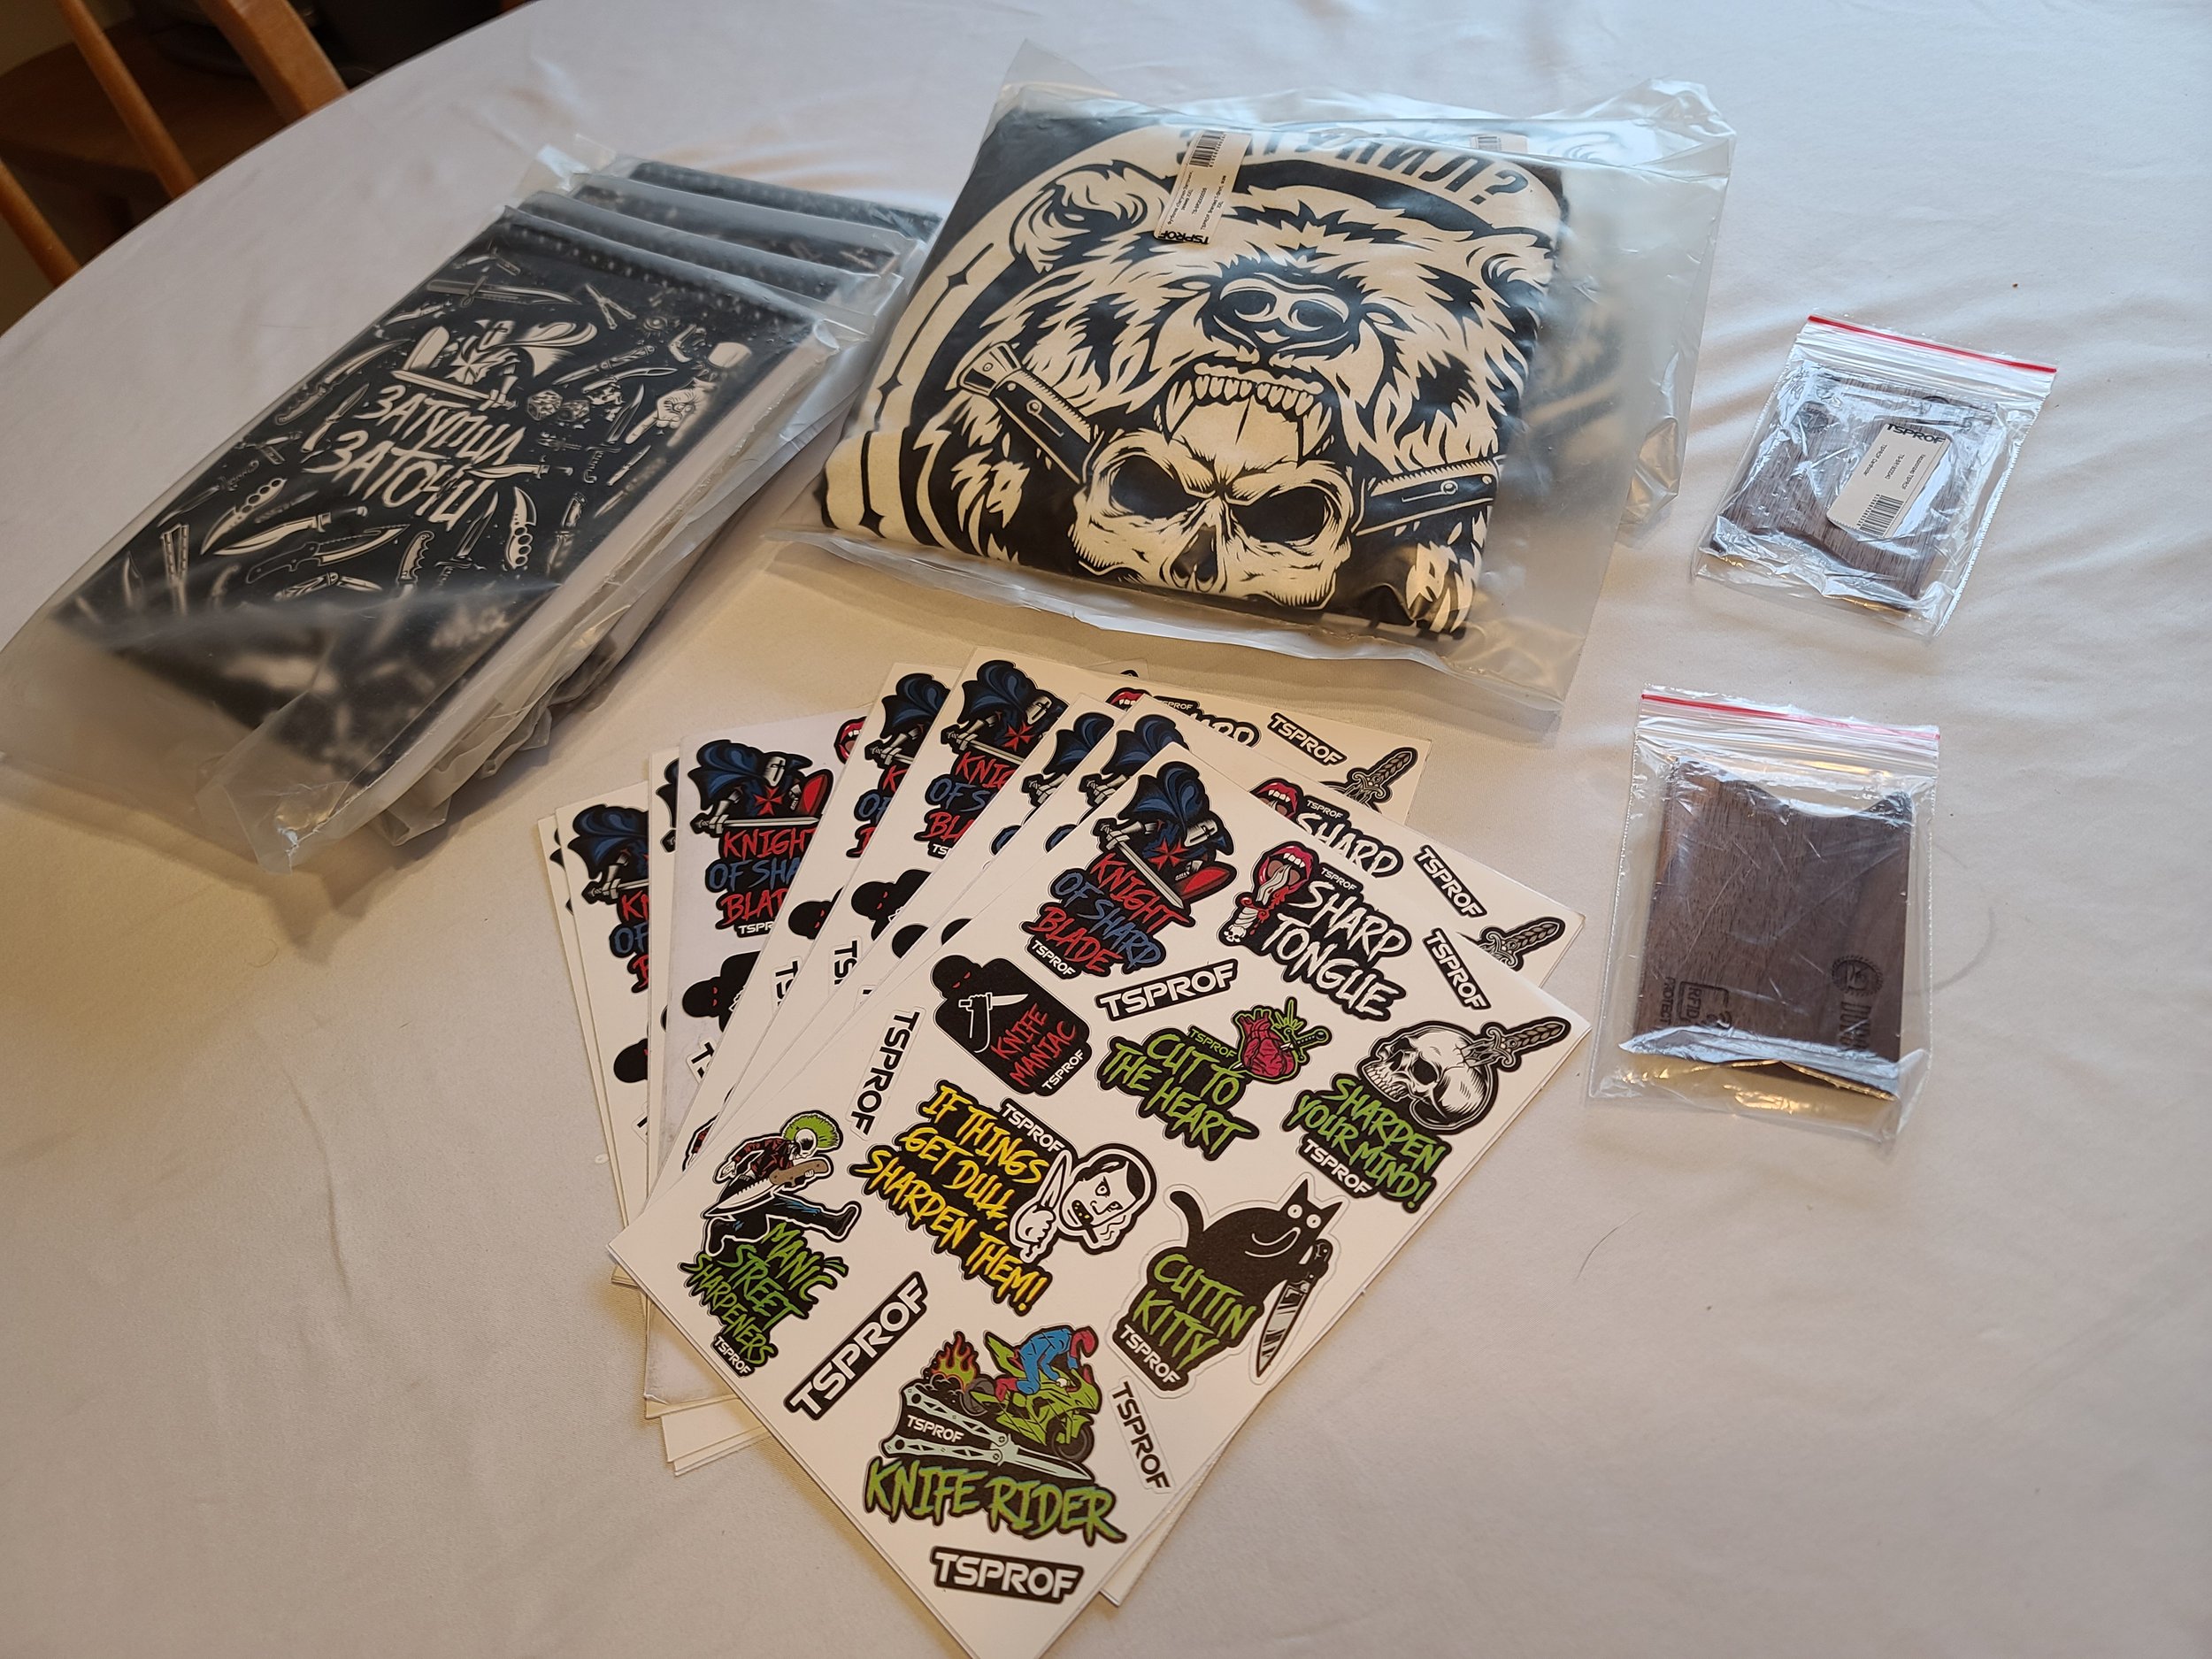
The Bonus Stuff
DISCLAIMER: While we were not paid for this review, we were sent the kit for free along with 10 sticker packs, 2 t-shirts, 5 notebooks, and 2 wooden card holders., About $125 value. We were offered the sharpening kit, they sent all the rest along with it as a surprise.
We recently had the opportunity to take a look at the TSPROF Kadet sharpening system. After a couple of hours of assembly and sharpening, we certainly have quite a few opinions on this rather highly rated, and rather pricey, professional sharpening kit.
I spent over a decade working in kitchens after my culinary arts/baking and pastry degree. I’ve seen a few different versions of these sharpening systems, so I was looking forward to putting it through it’s paces.

Opening and Assembly:
So, the kit comes in a sleeve wrapped foam and cardboard box. Everything was packed securely, even to the point that I had a little bit of trouble getting some of the pieces out. If you want to use the box as storage, I’m not sure how many times you’ll be able to keep it snug. If you have the space, I recommend just keeping it assembled and out of the way.
The machining itself is superb. Everything fits super snug and super clean. Edges are chamfered or rounded, depending on the need. I’ve done some machining over the years, and it’s impressive the fit and finish of the machined aluminum. The base is a solid chunk of resin, and it is SOLID. It has enough mass to feel stable and keep it in place. The feet are non-slip, and the whole thing feel rock solid on the table. No rocking at all. Even the little label on the base is rubber, giving the arm something soft to rest on if/when you fold it down.
The set screws need a tiny drop of machining oil. They move well enough, but a drop of oil has them moving cleanly, even under clamping tension.
Now then, on to our vict….I mean, test subjects.
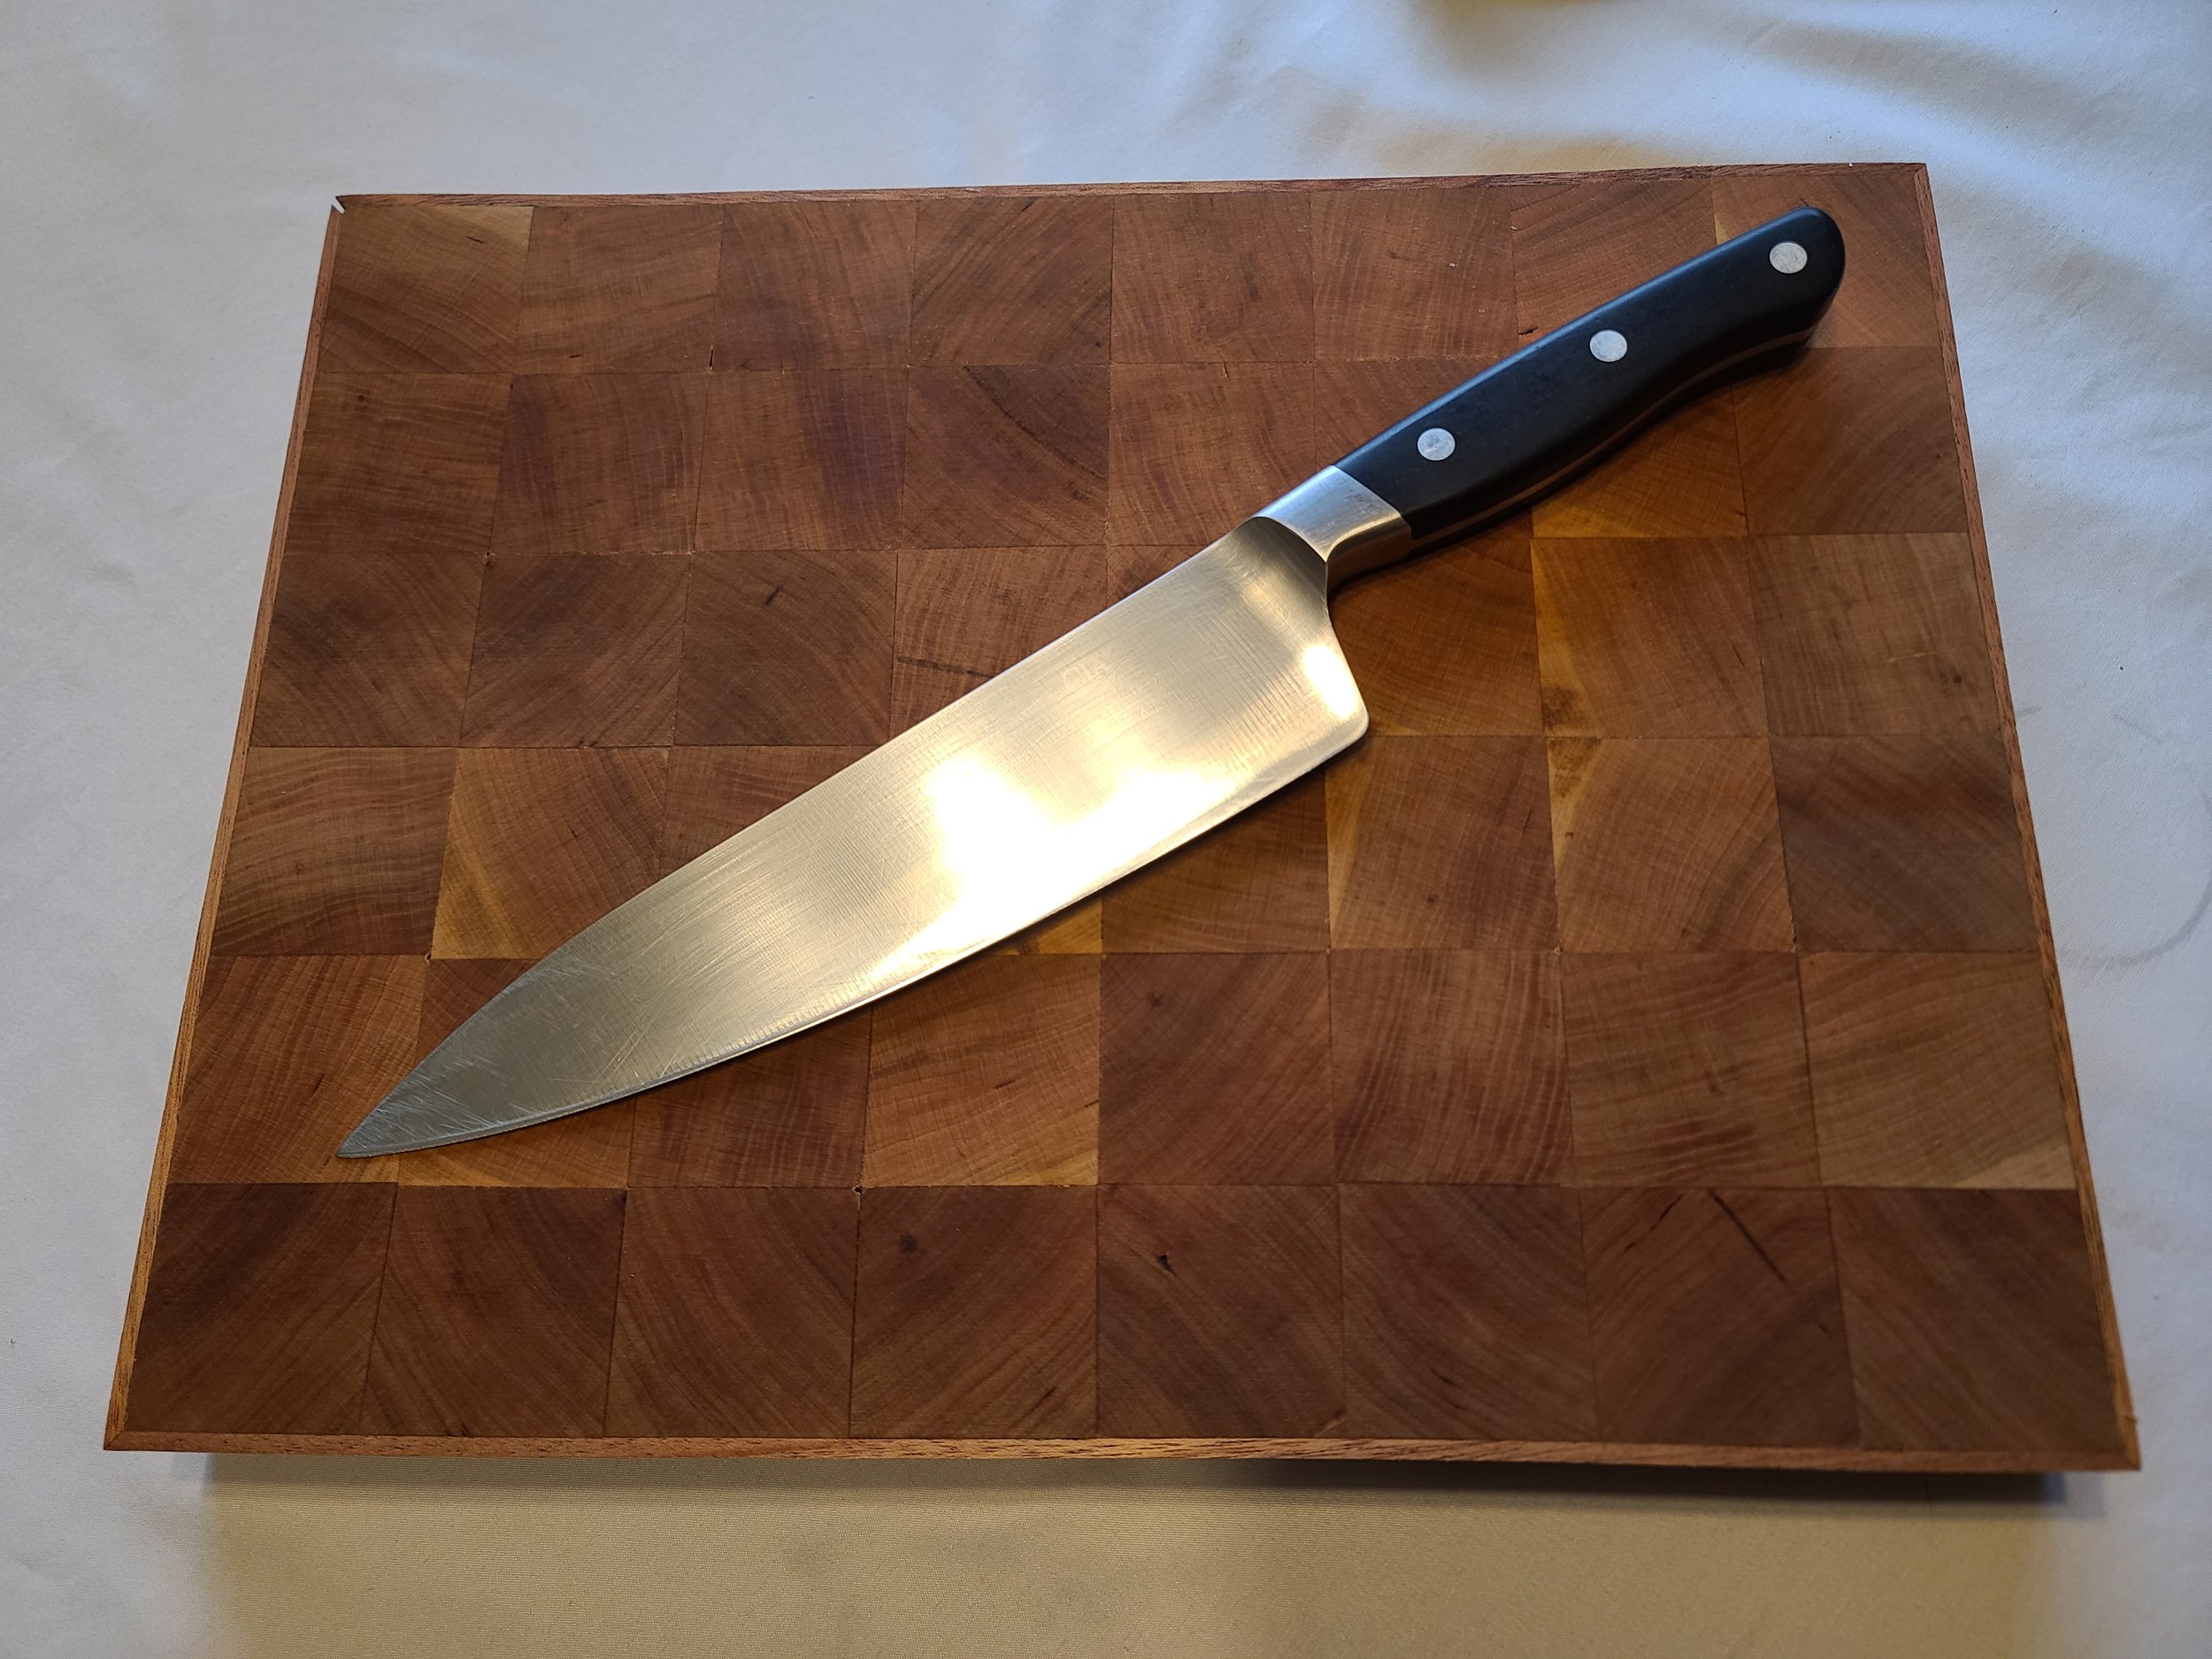
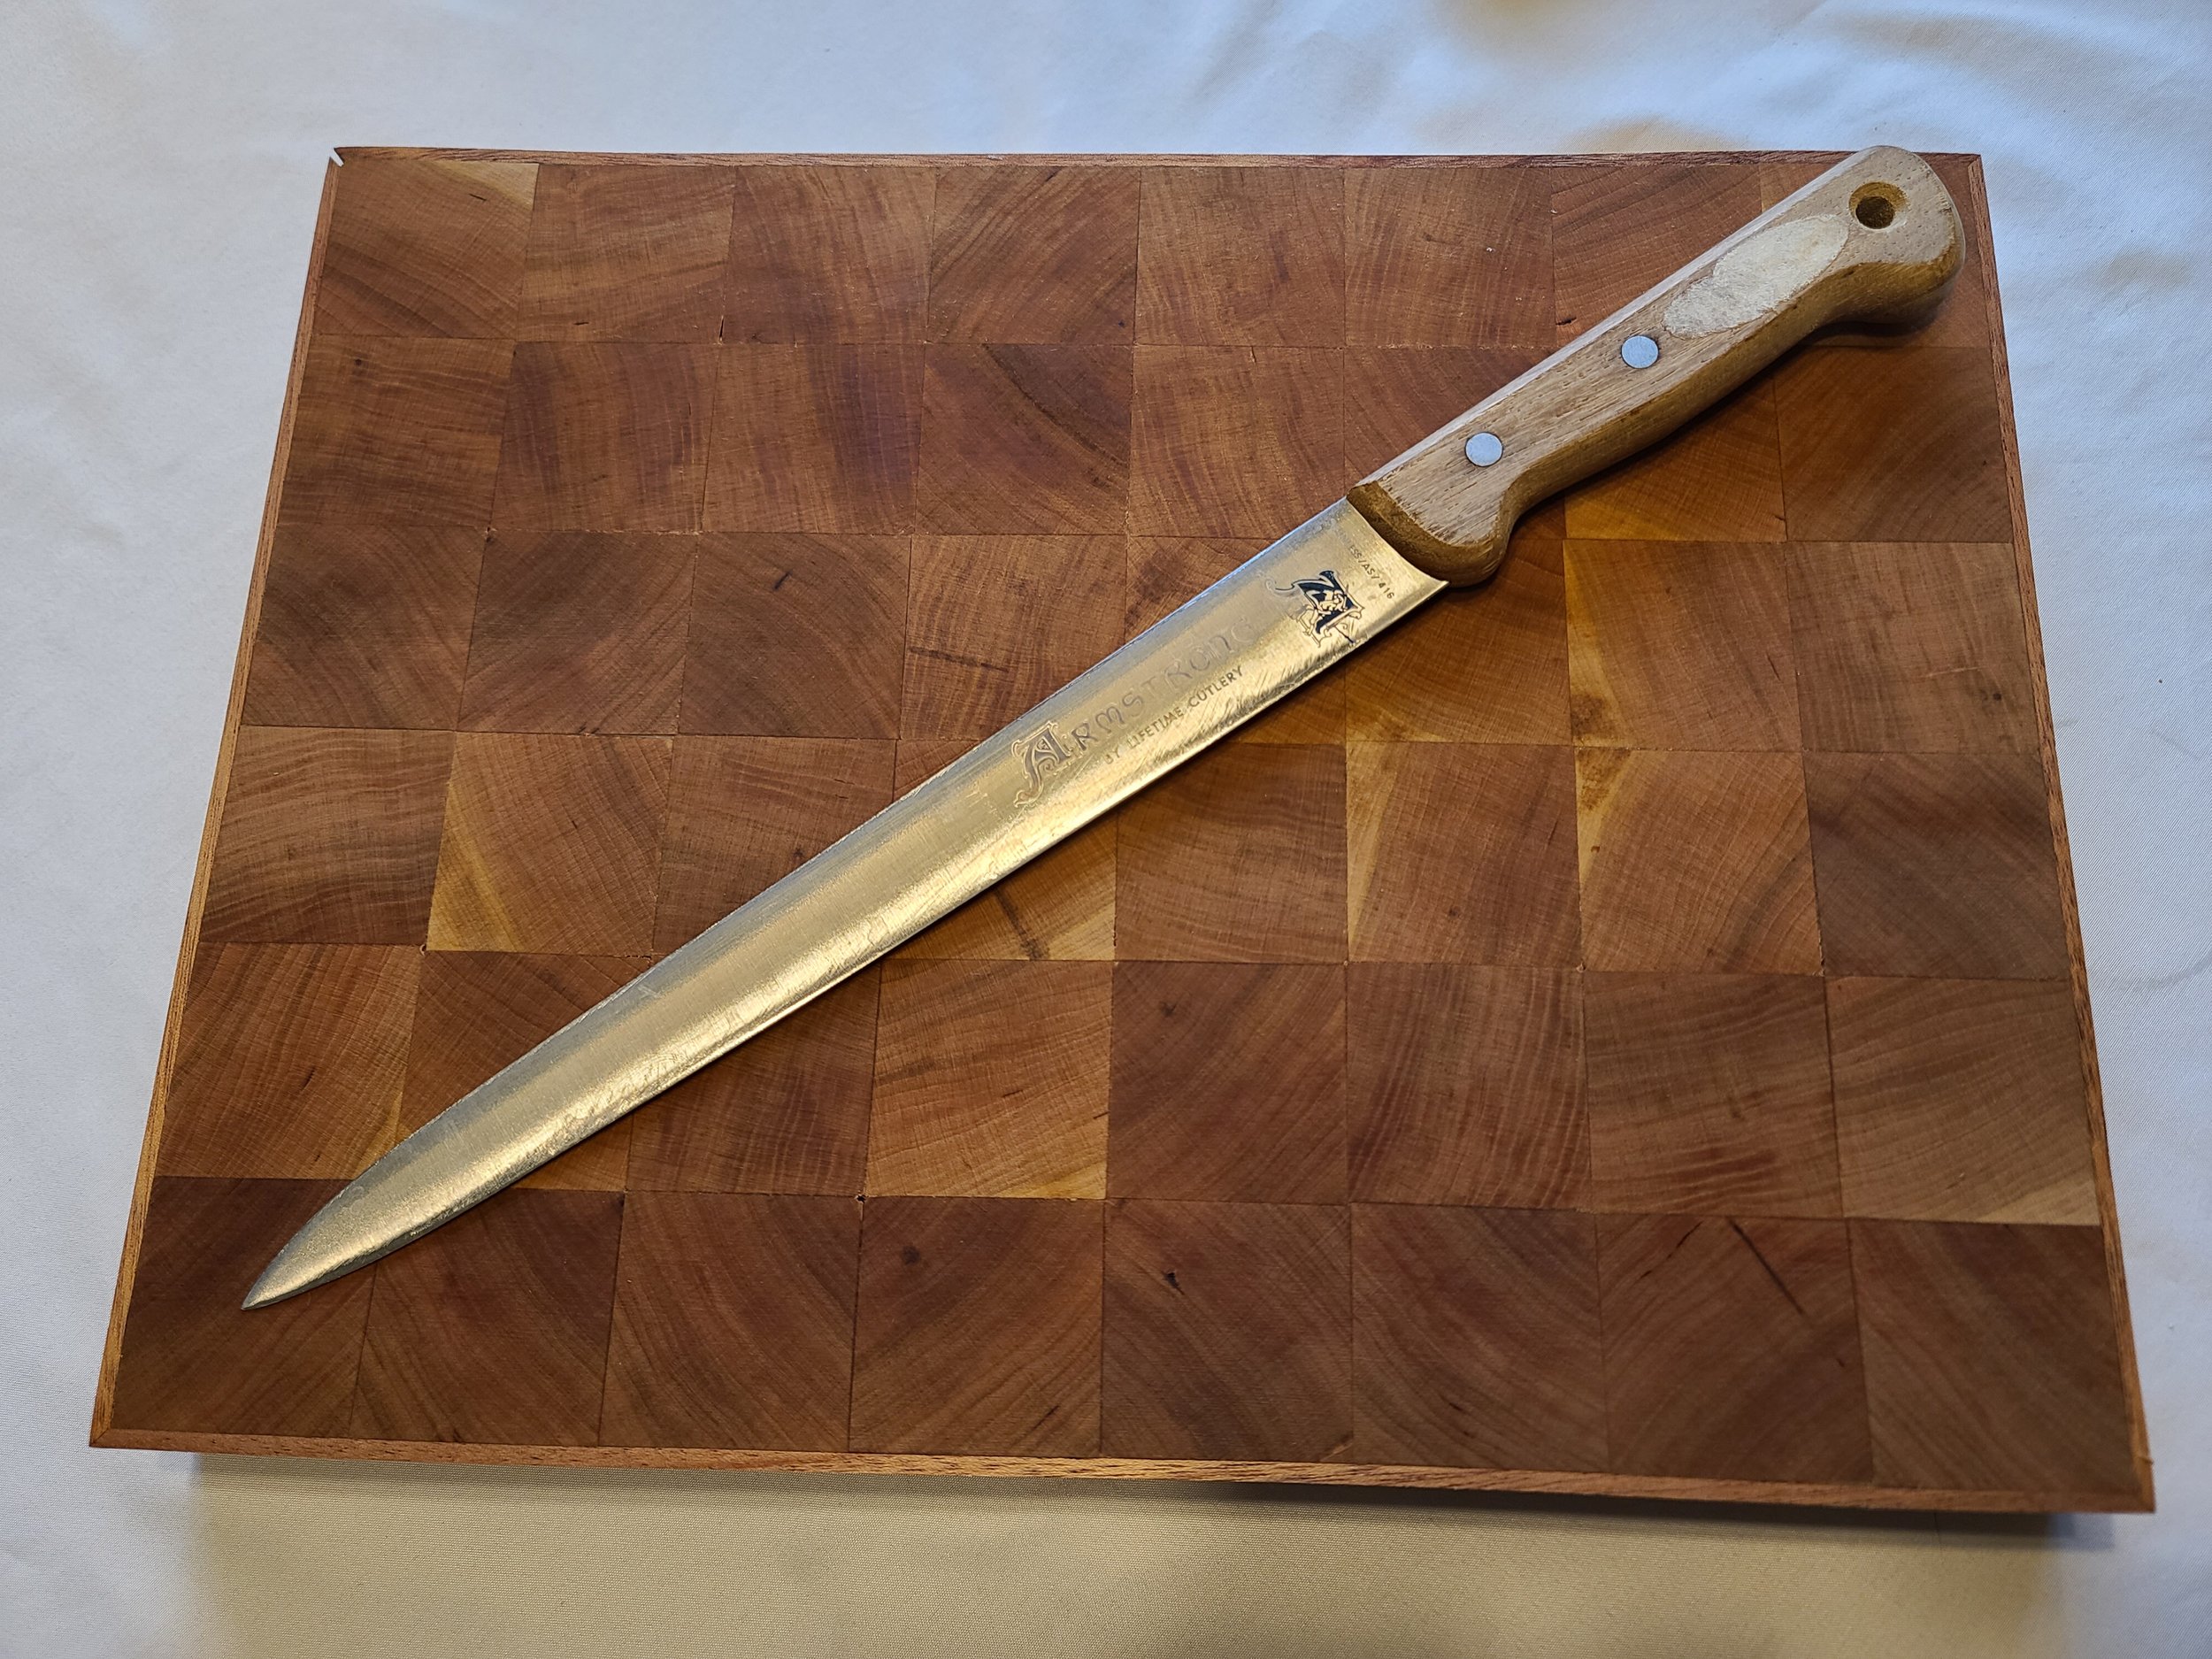
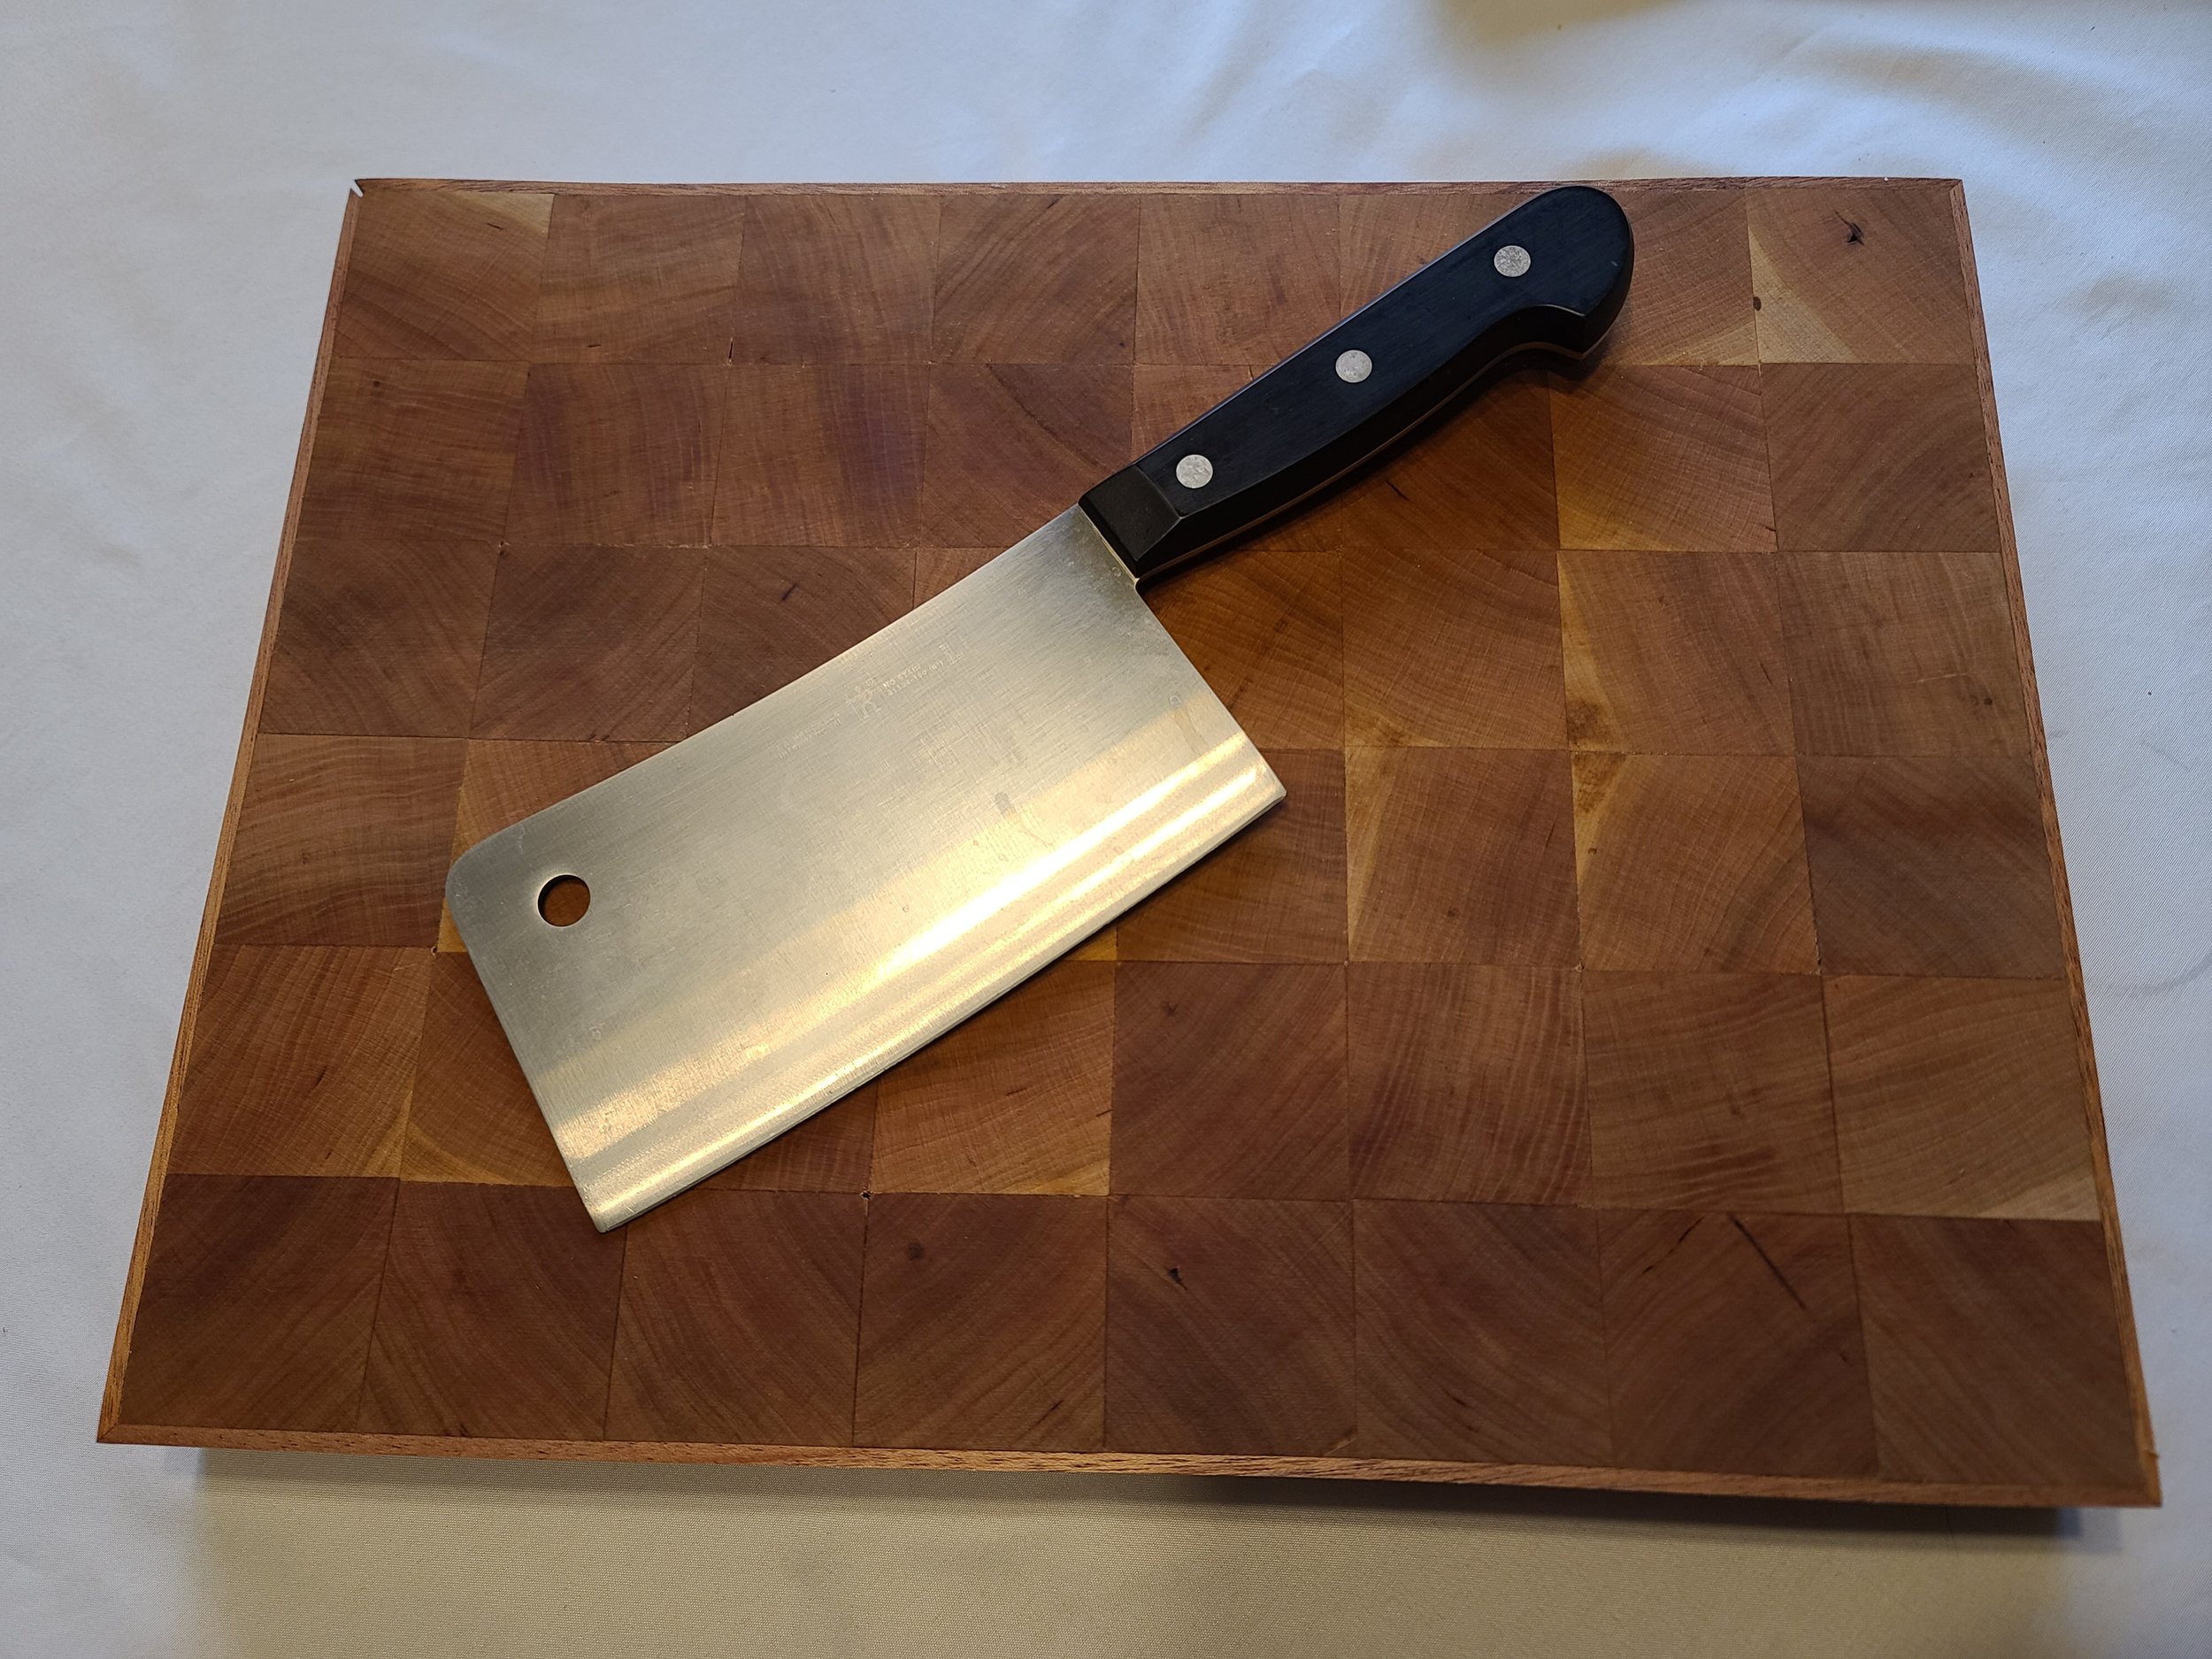
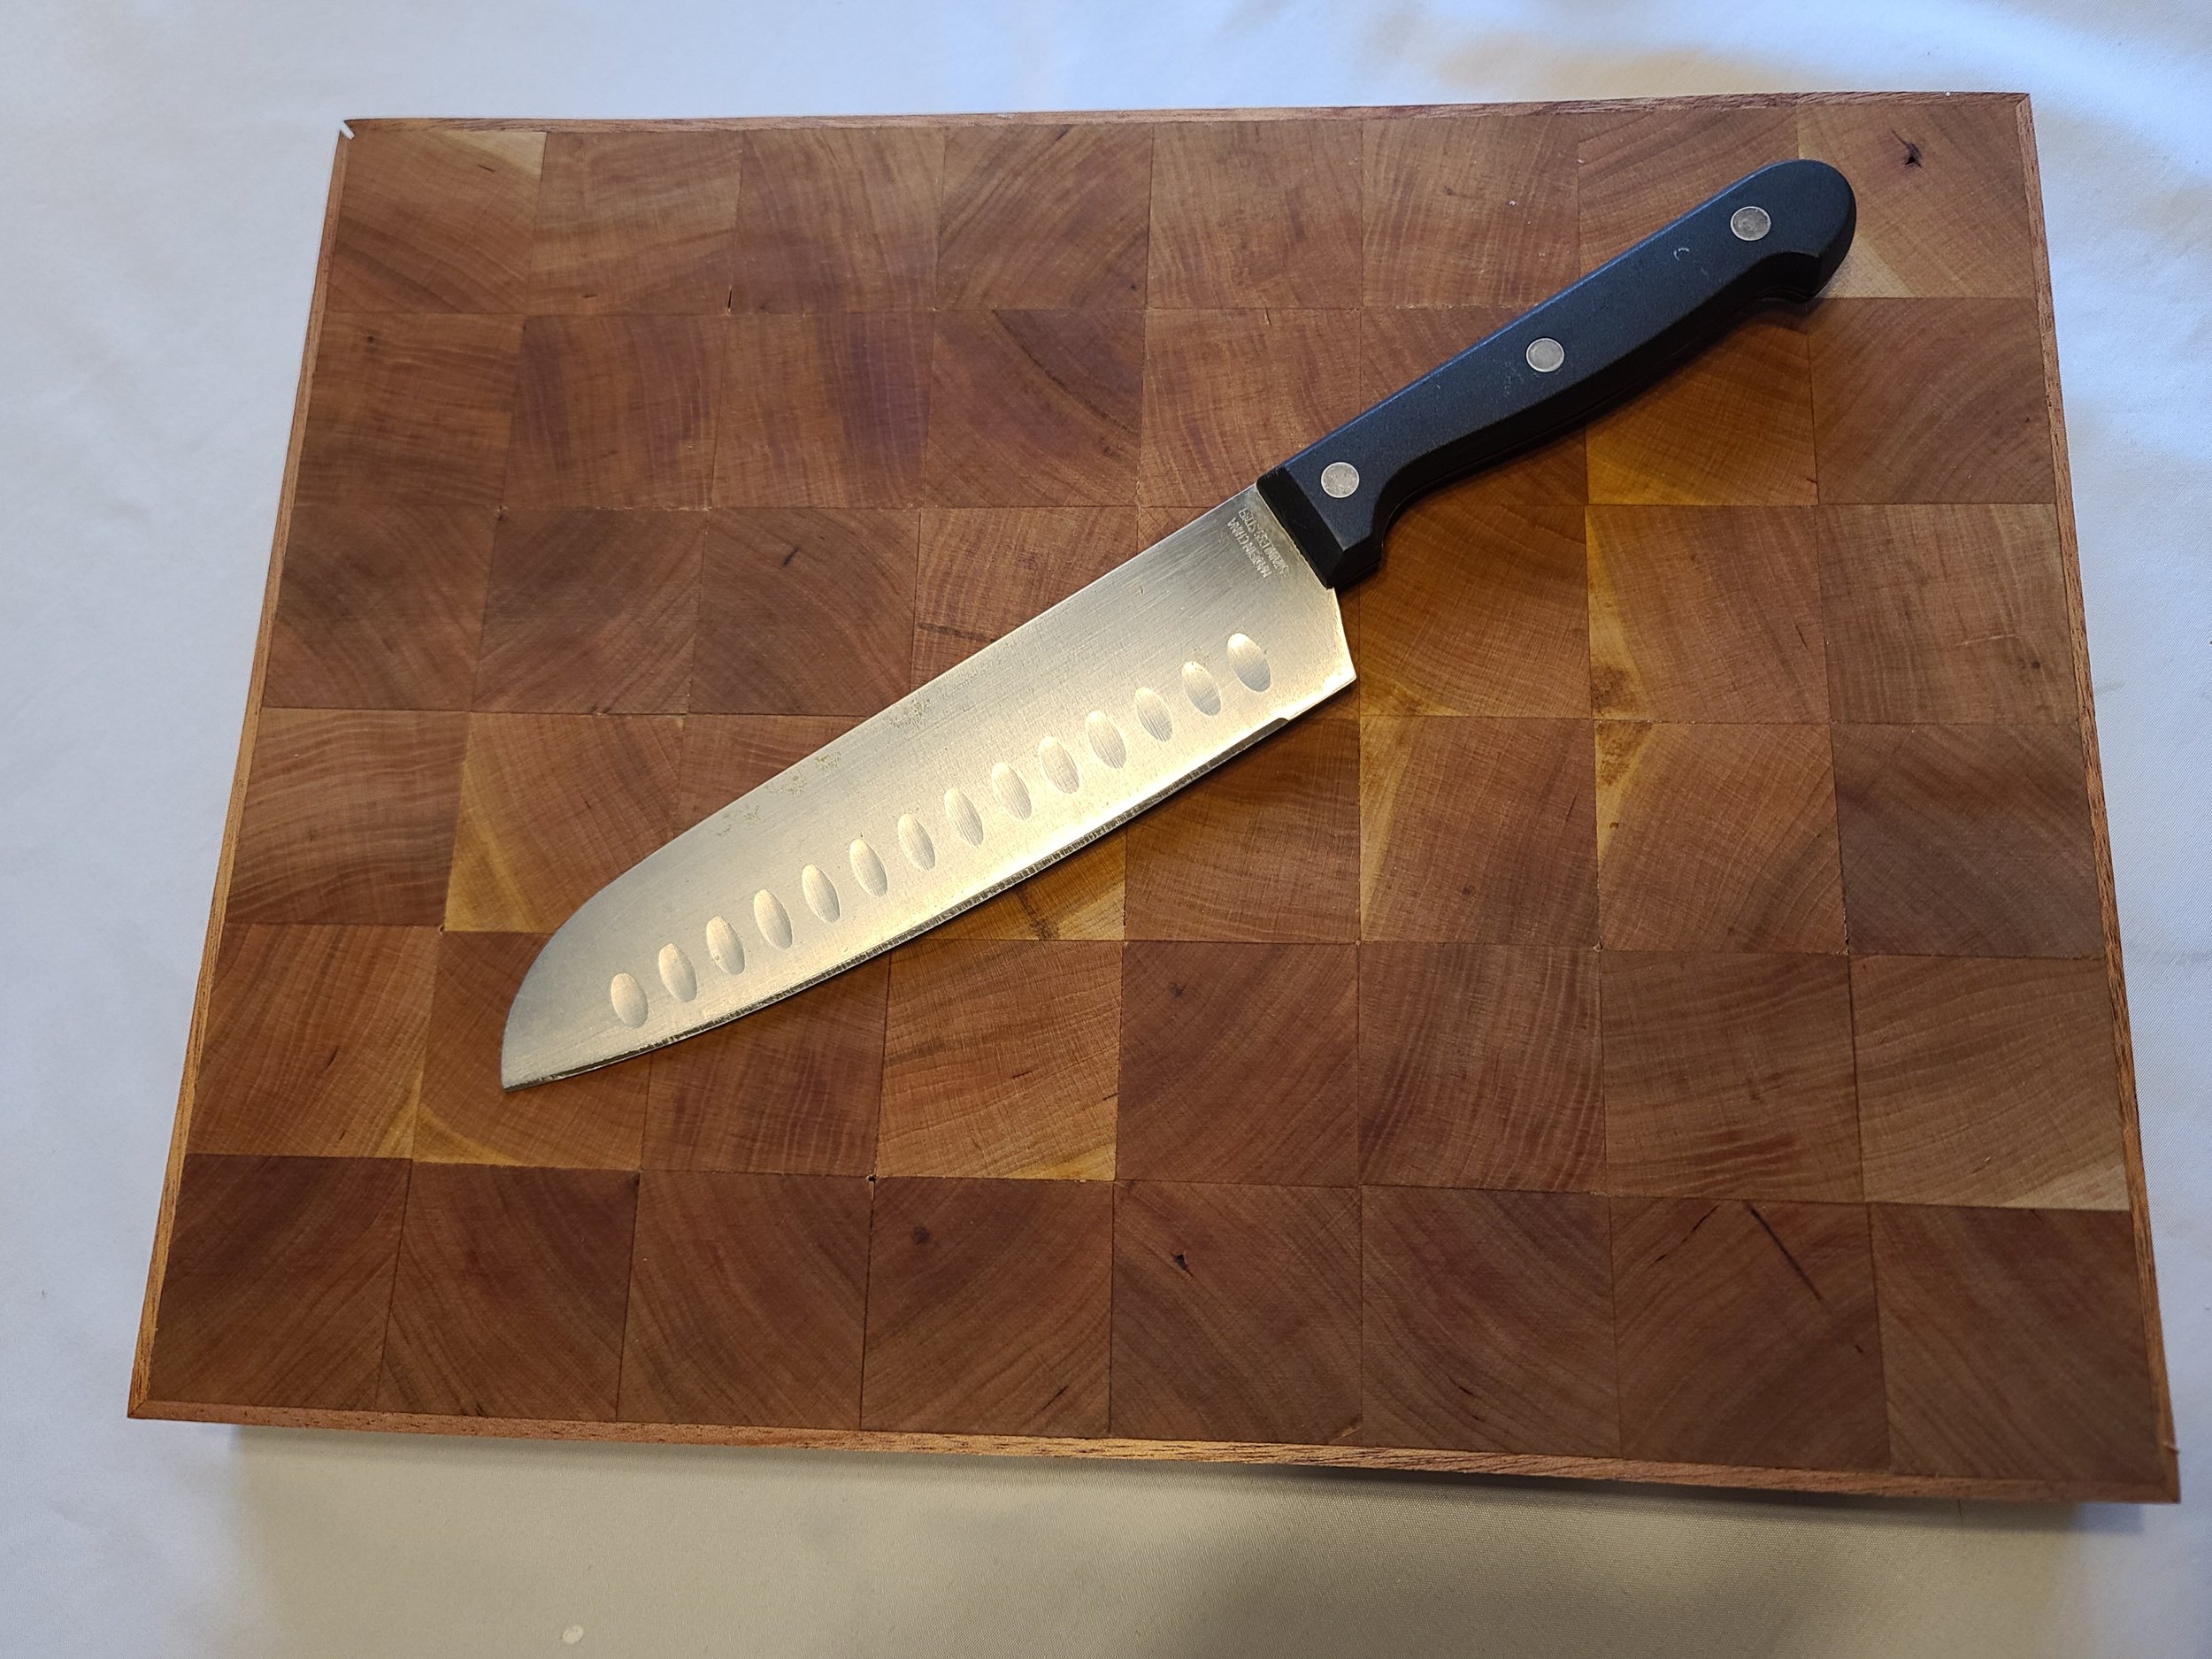
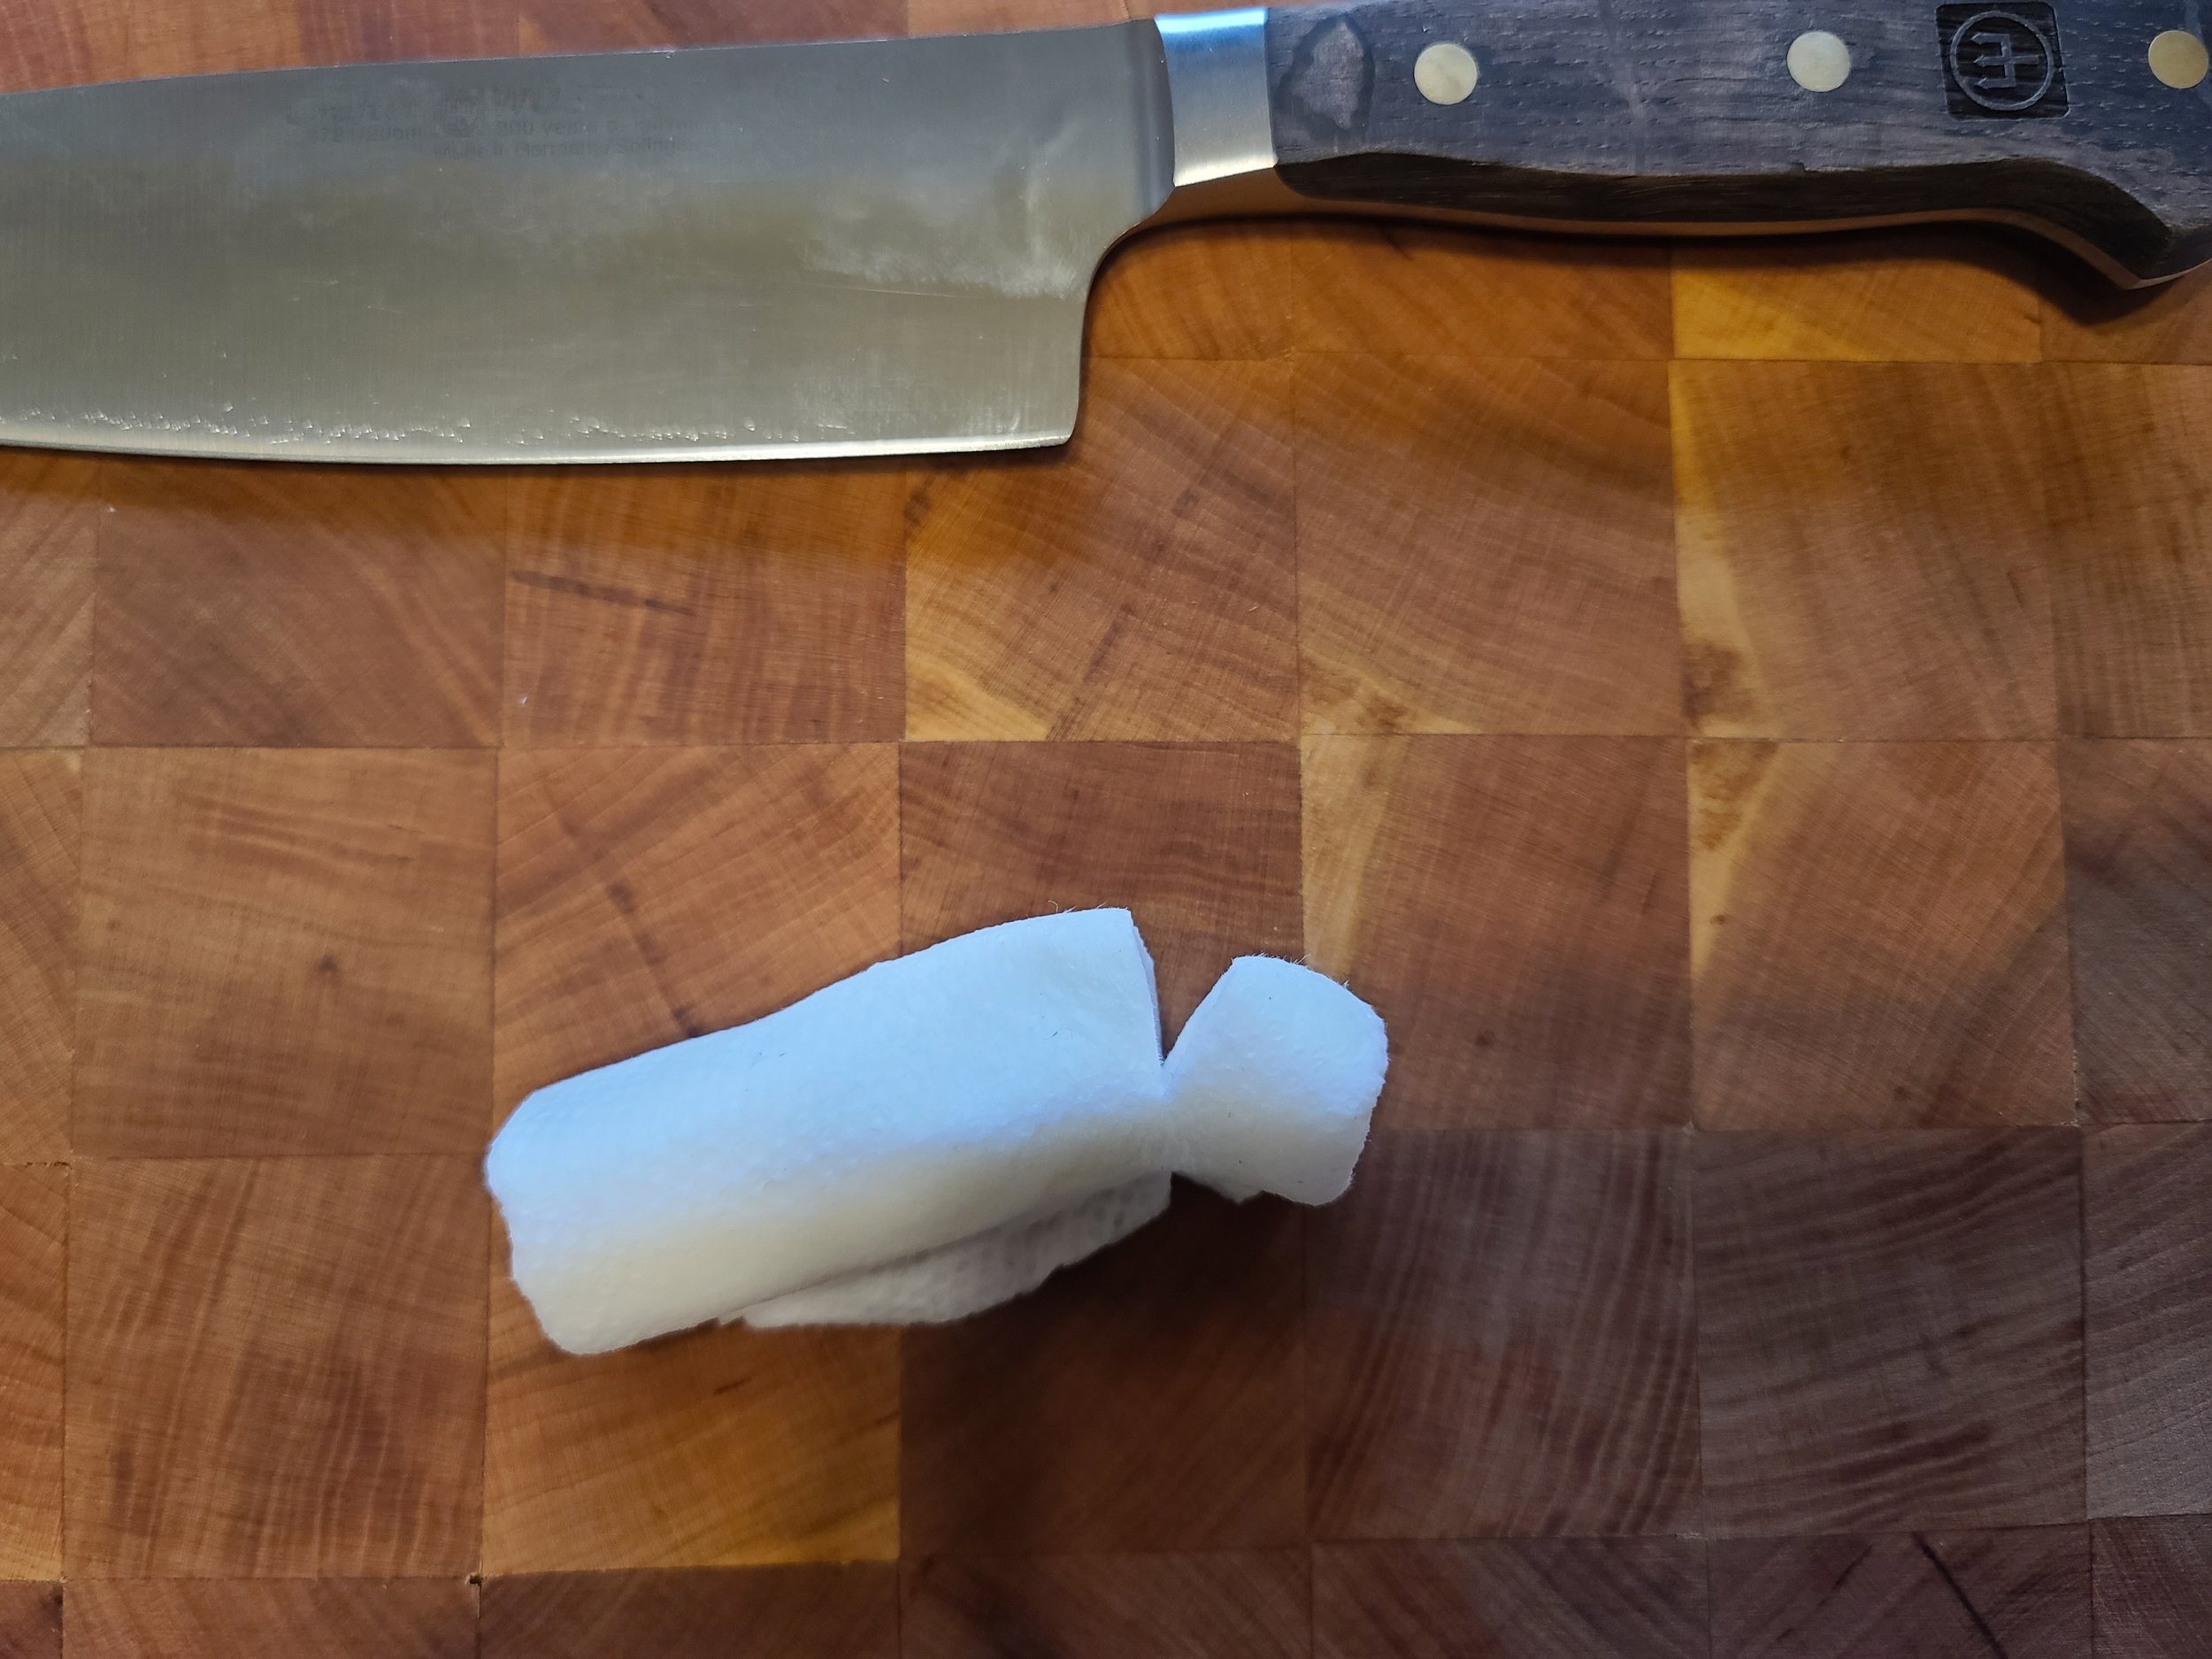
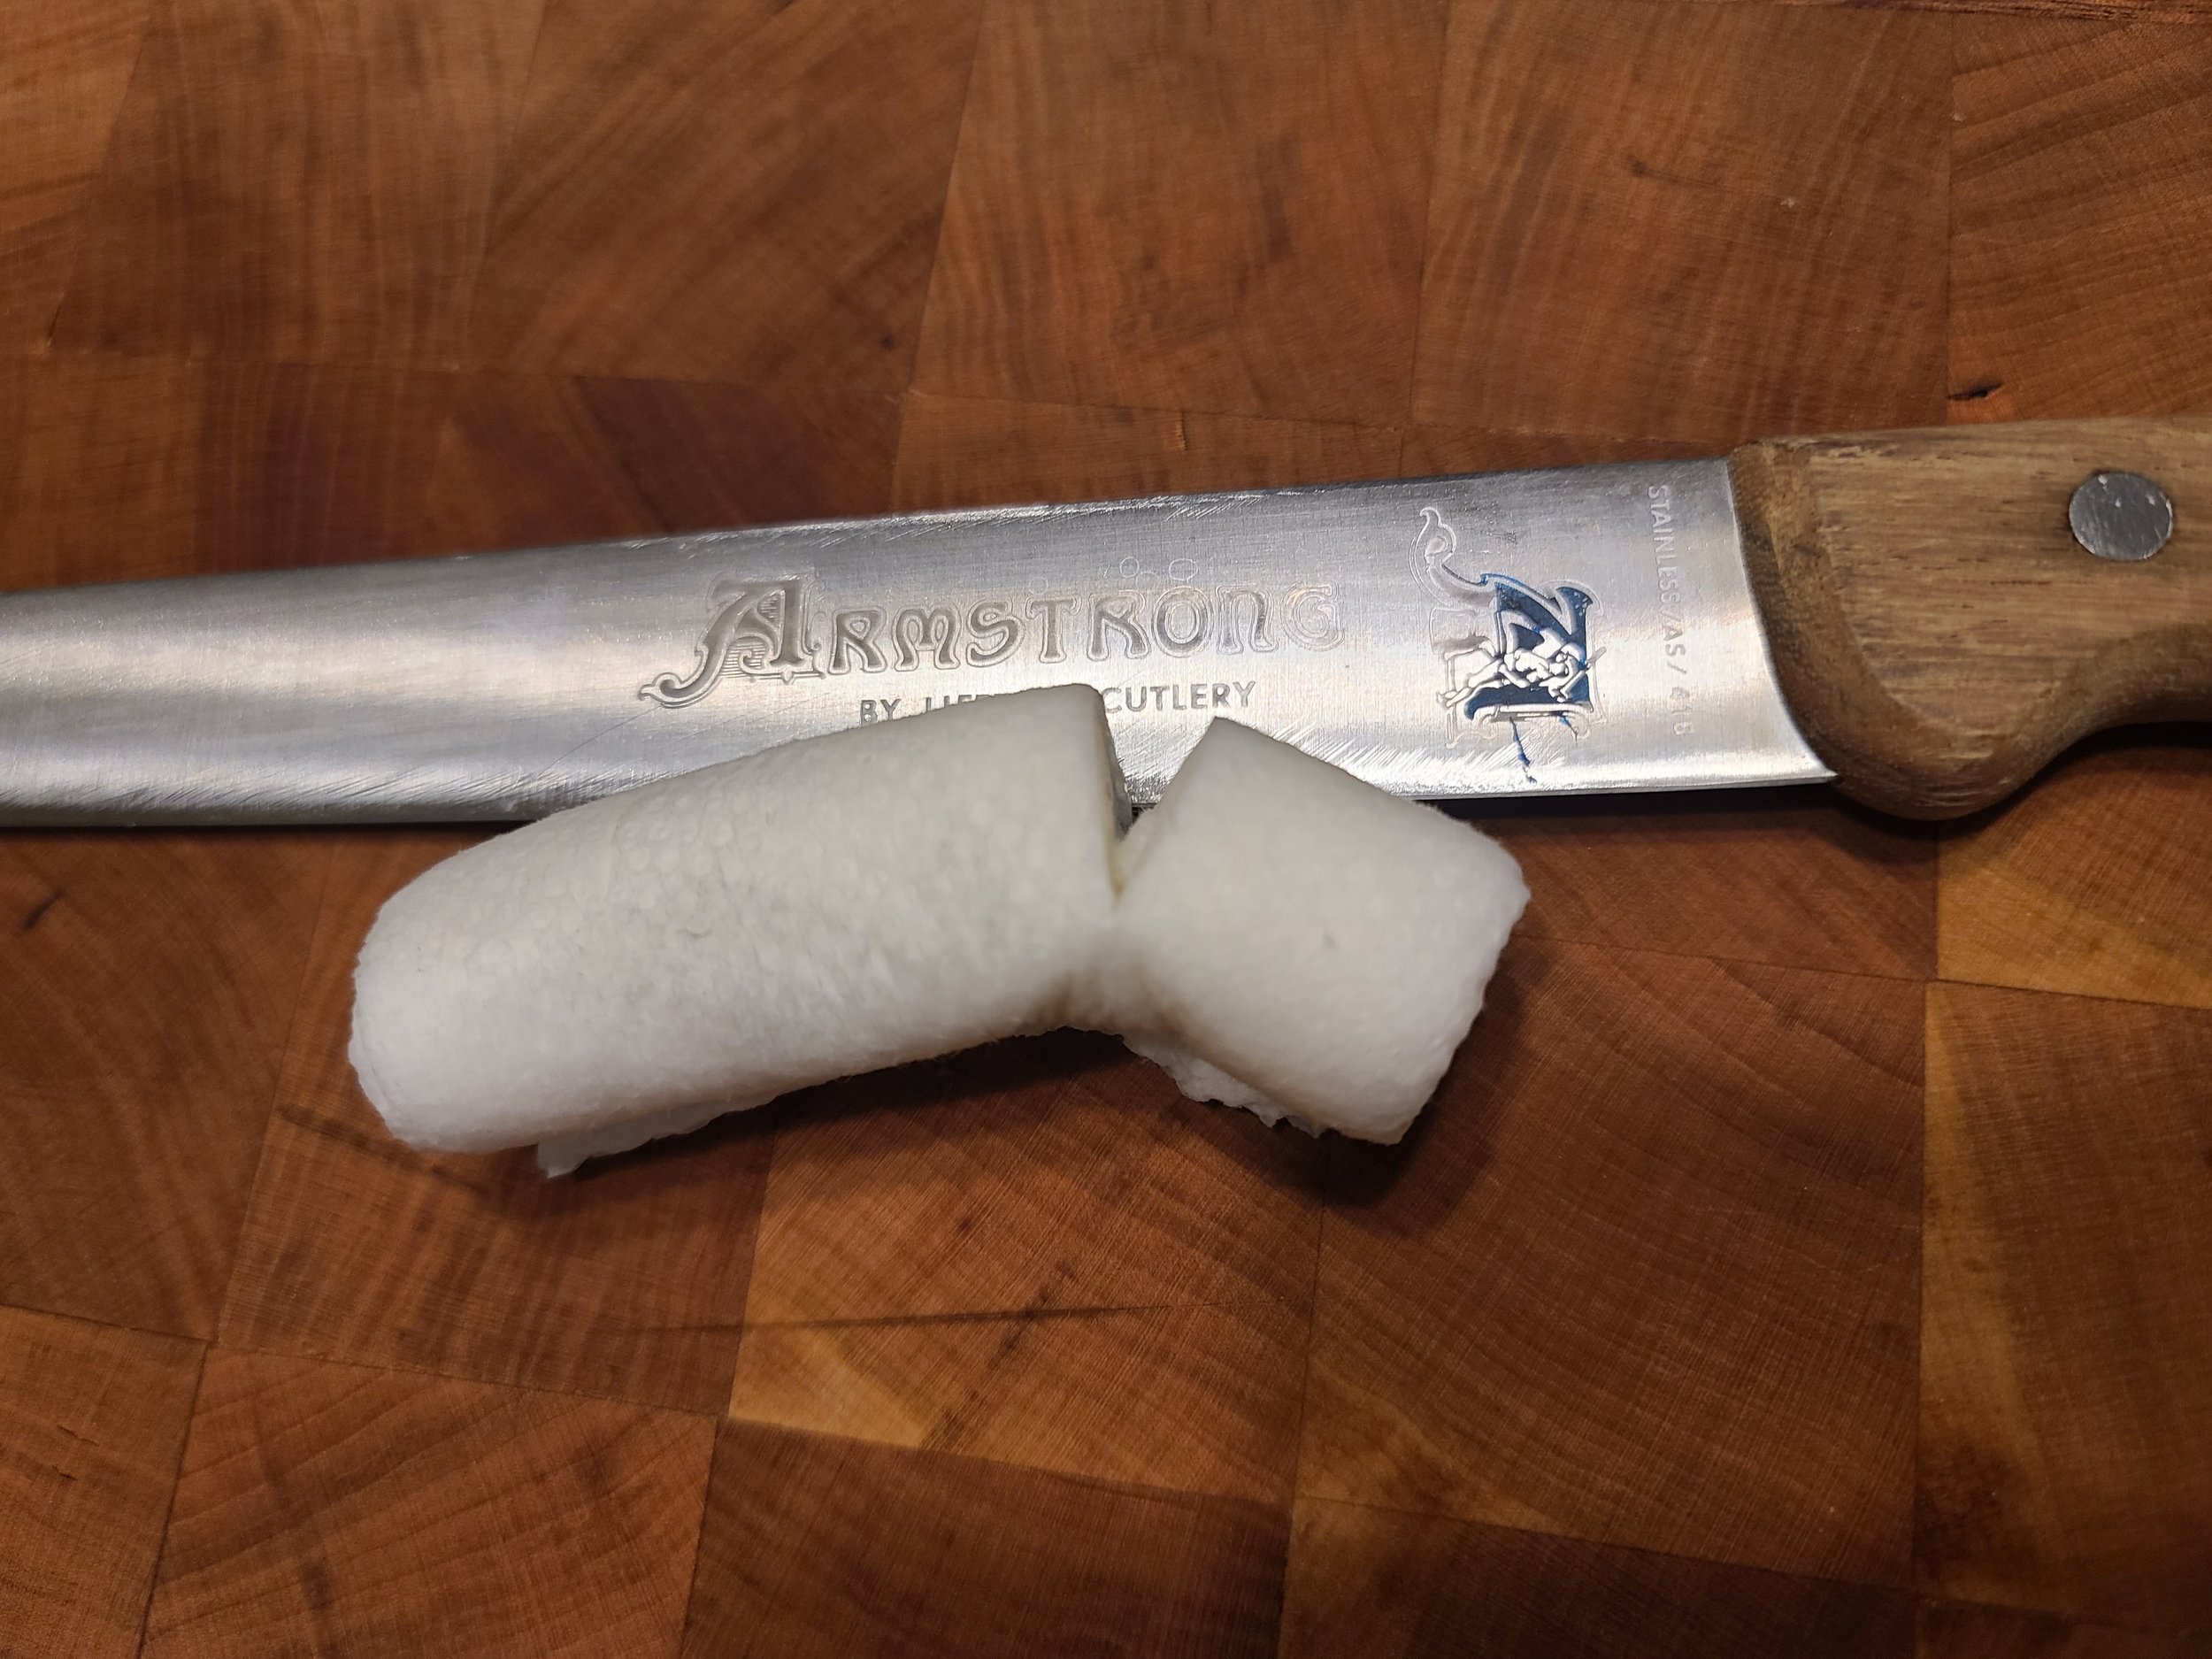
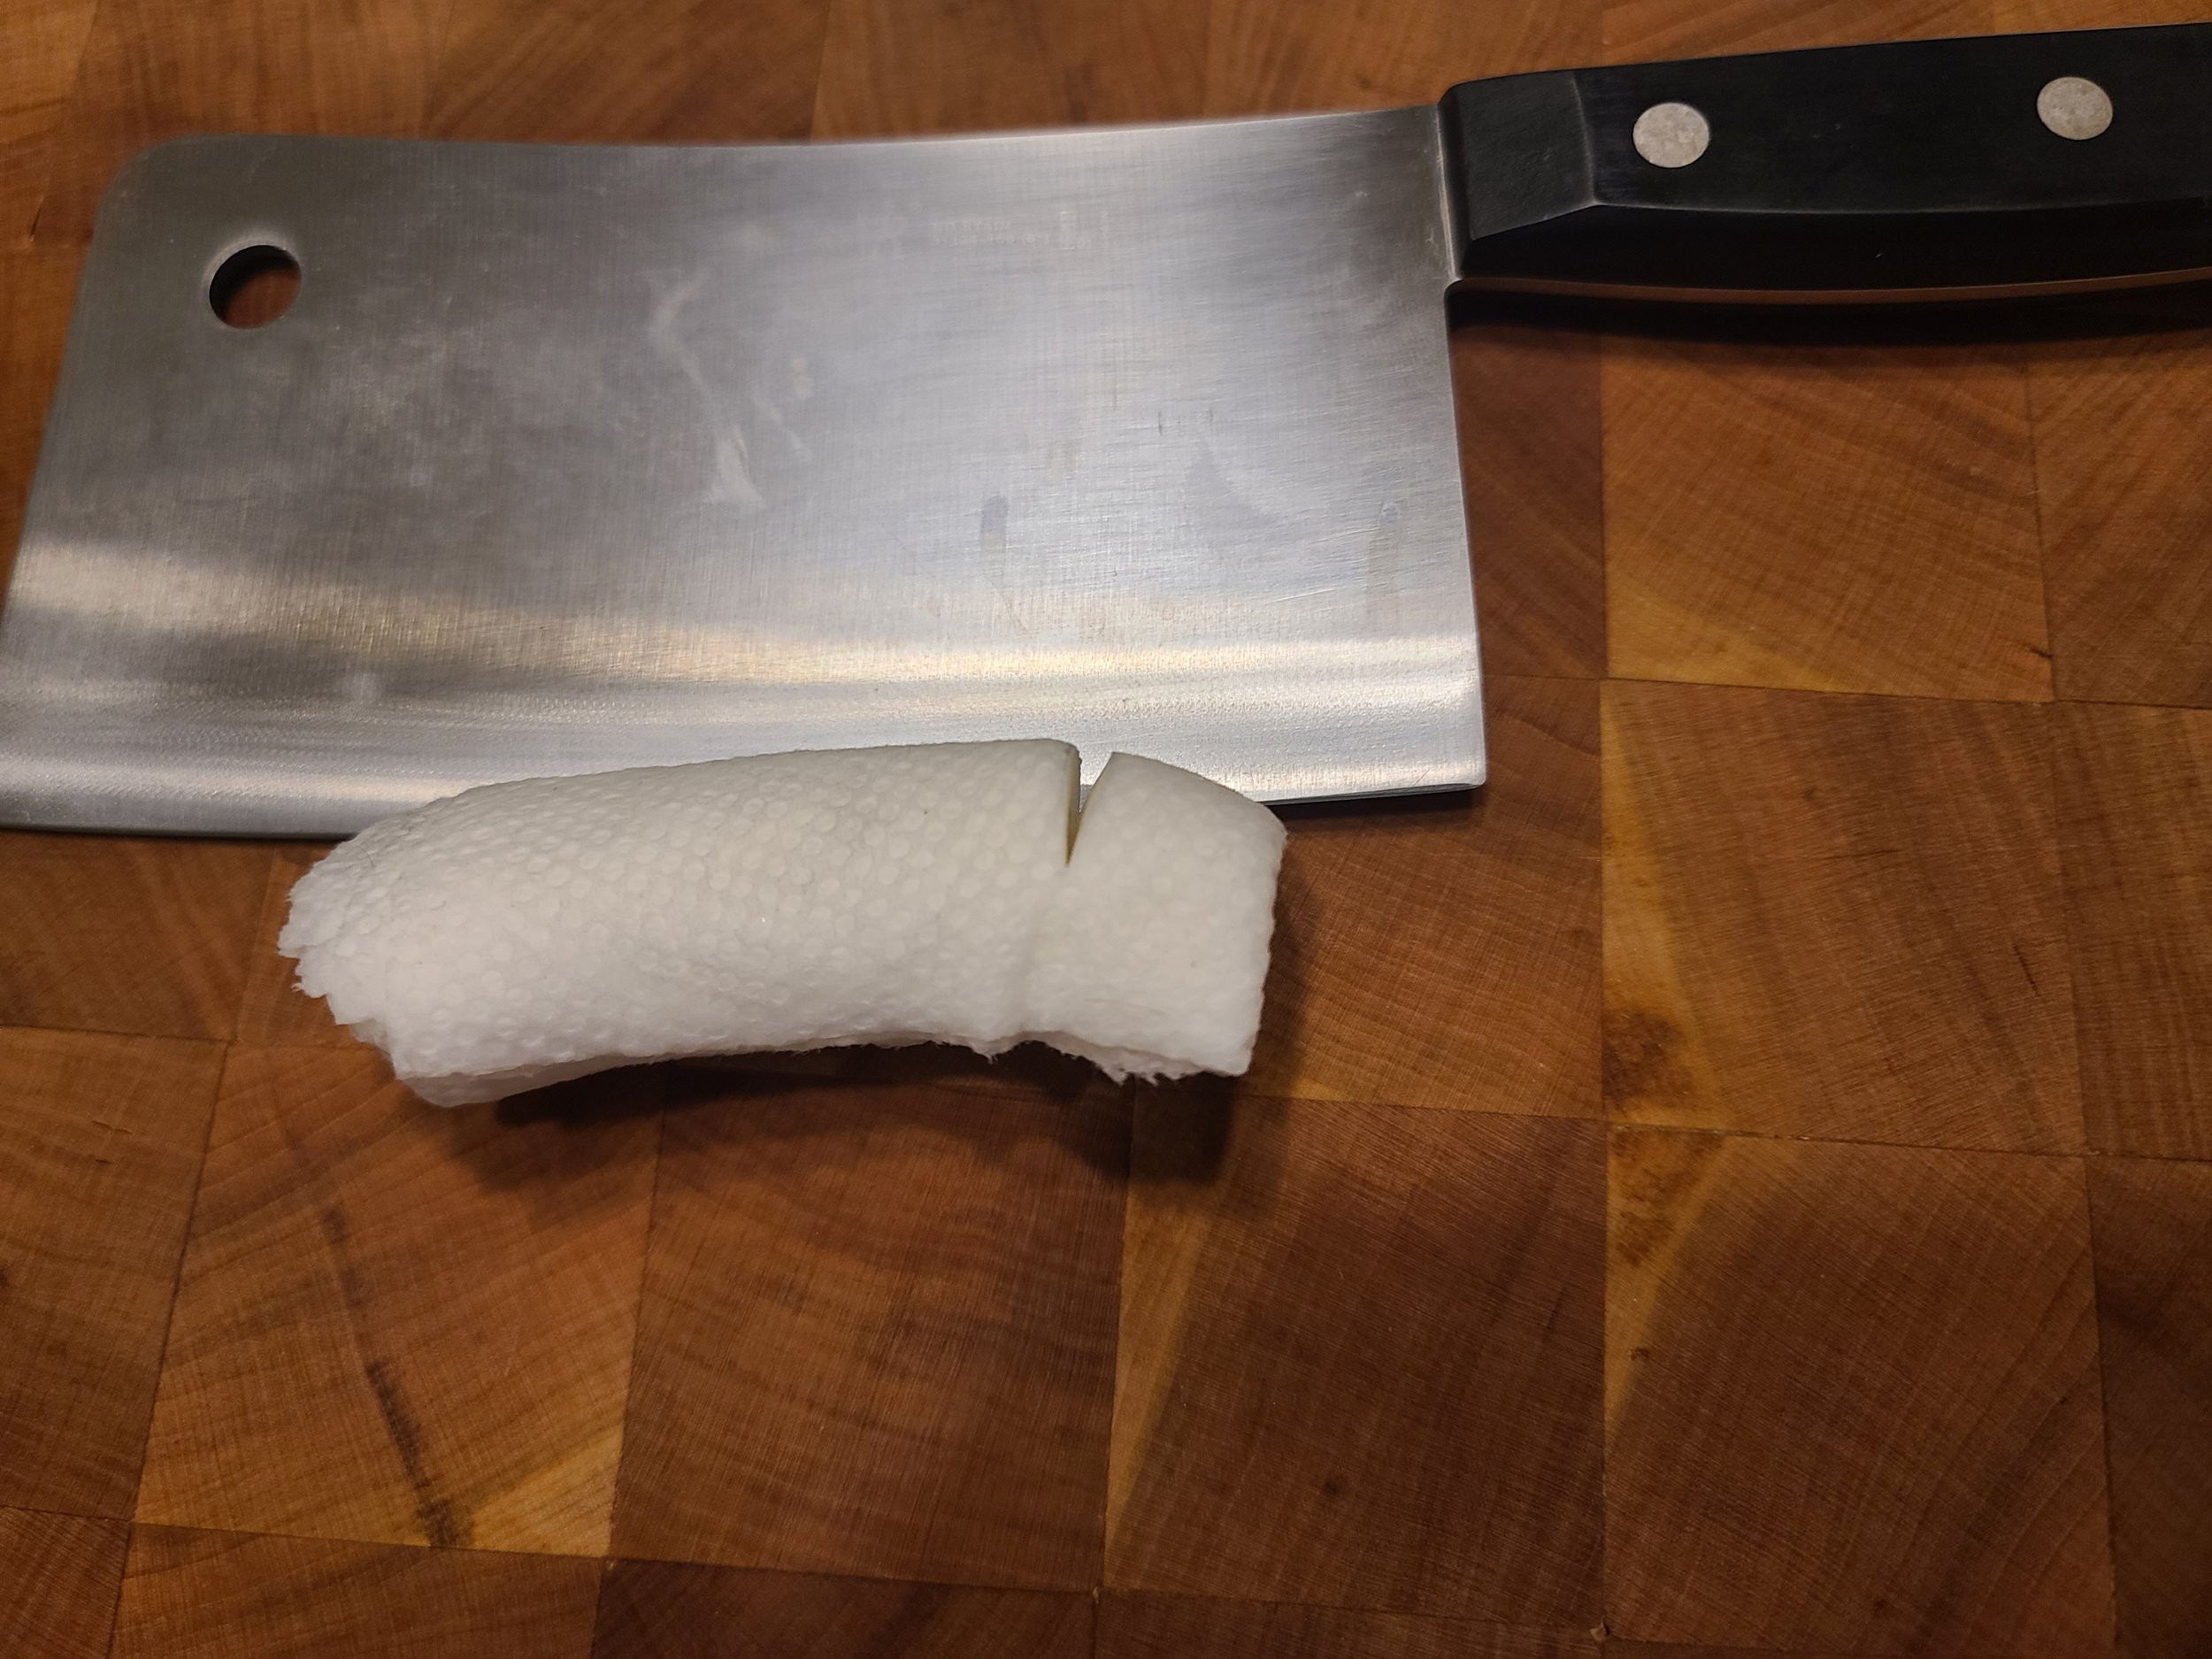
Froom left to right, we have my old school knife (which still has a solid enough edge), a vintage Armstrong slicing knife from my grandfather (416 stainless isn’t a very good steel, but it’s an old and LONG knife. Plus, it really needed some work), my fathers Henckles cleaver (super dull, but it needs a really wide angle for the bevel), and last, and certainly least, my partners old chef knife that she got with the place she moved into years ago (only the finest cheep Chinesium steel that you can get for $5. She has a much better knife now.)
There’s a secret bonus test at the end, but we’ll get to that in time.
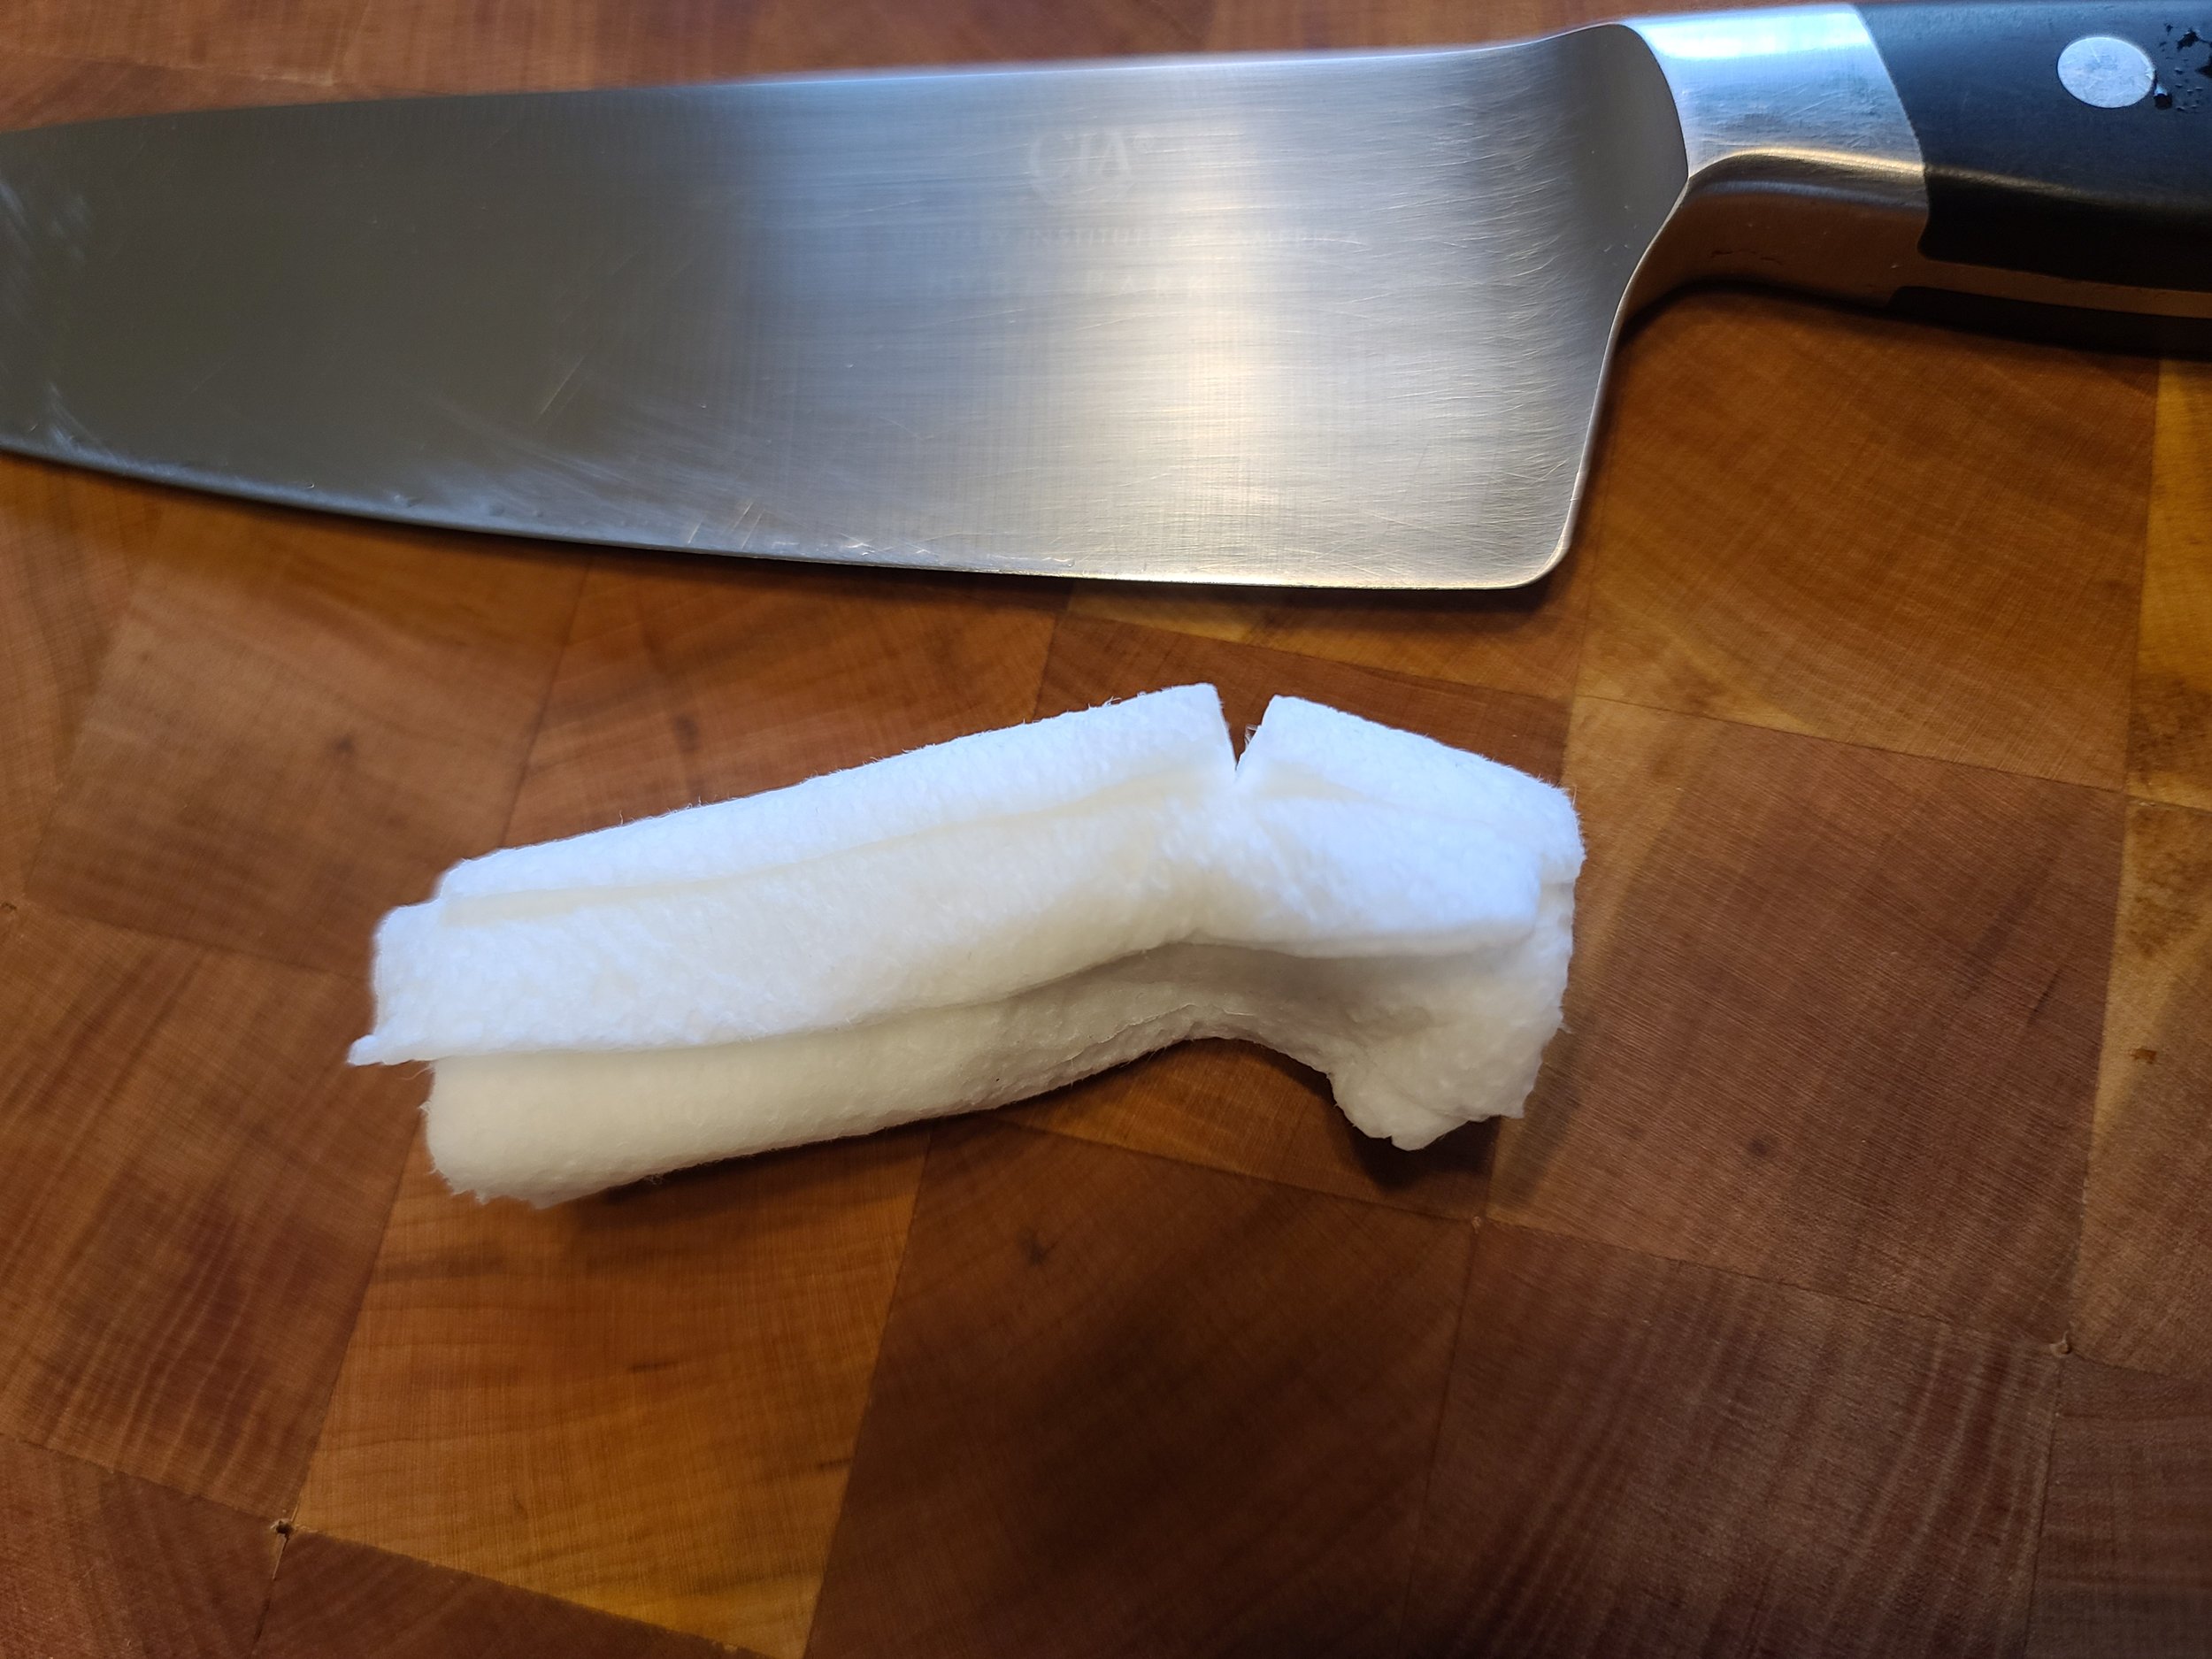
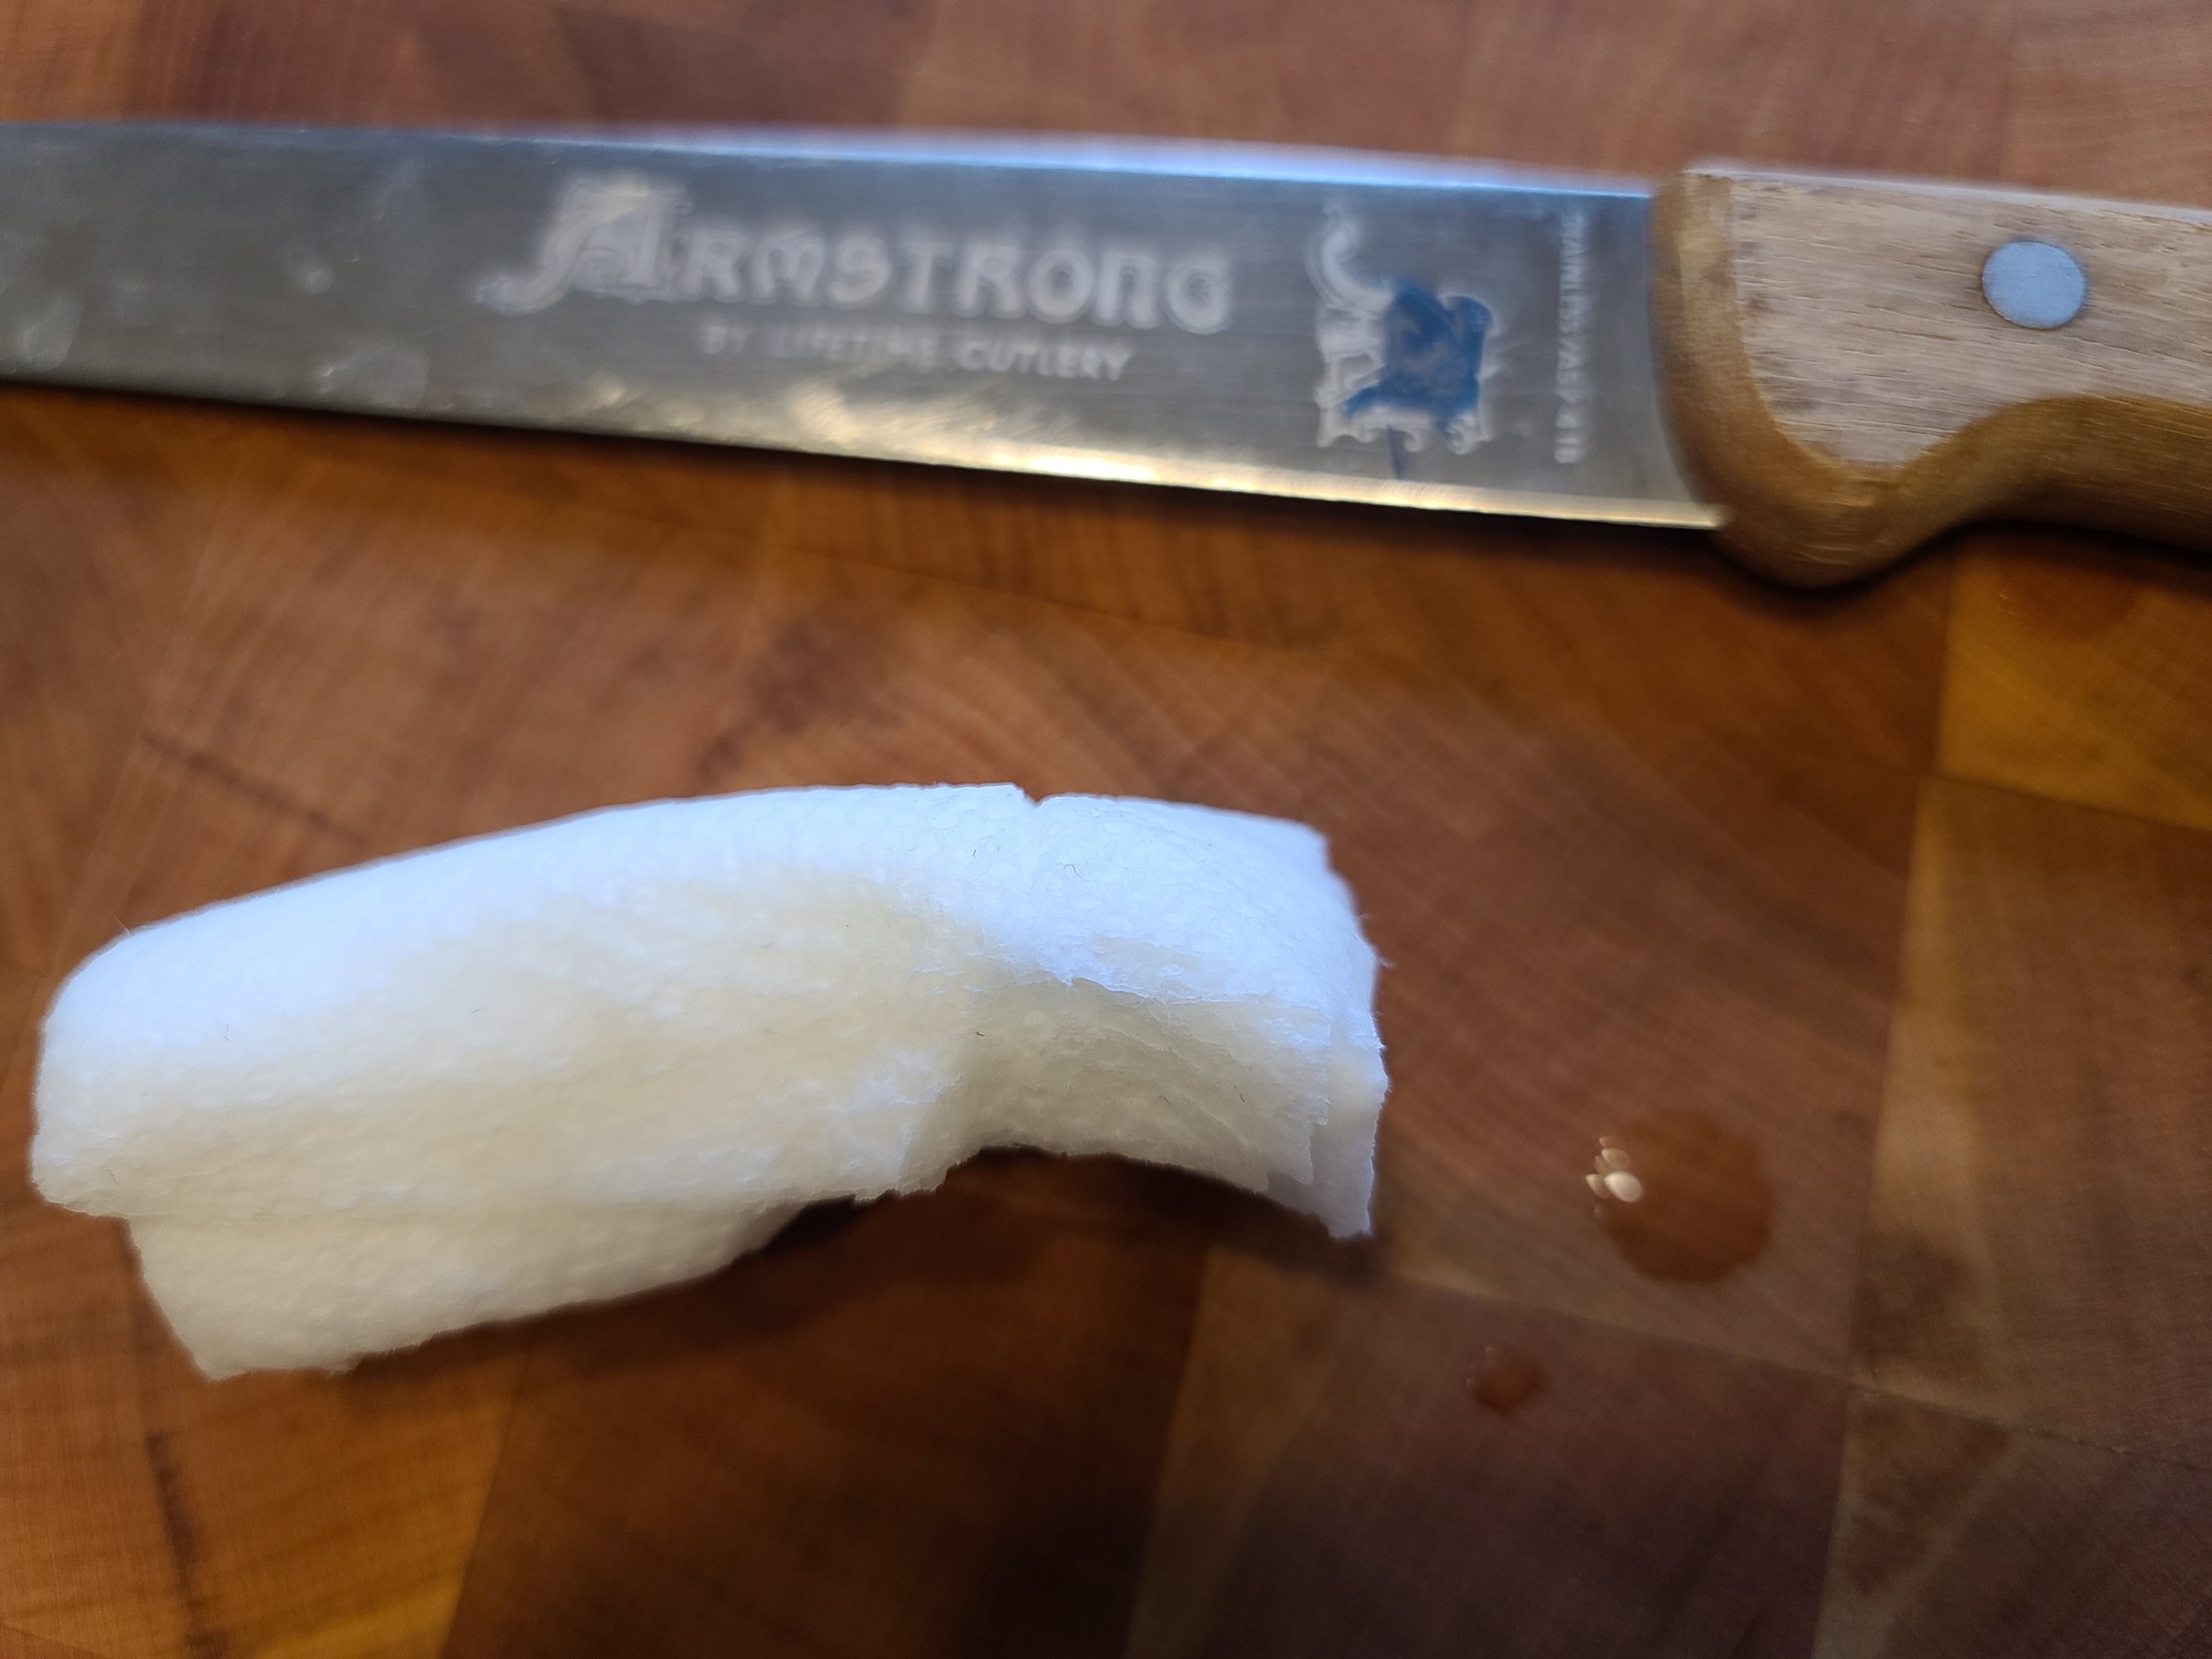

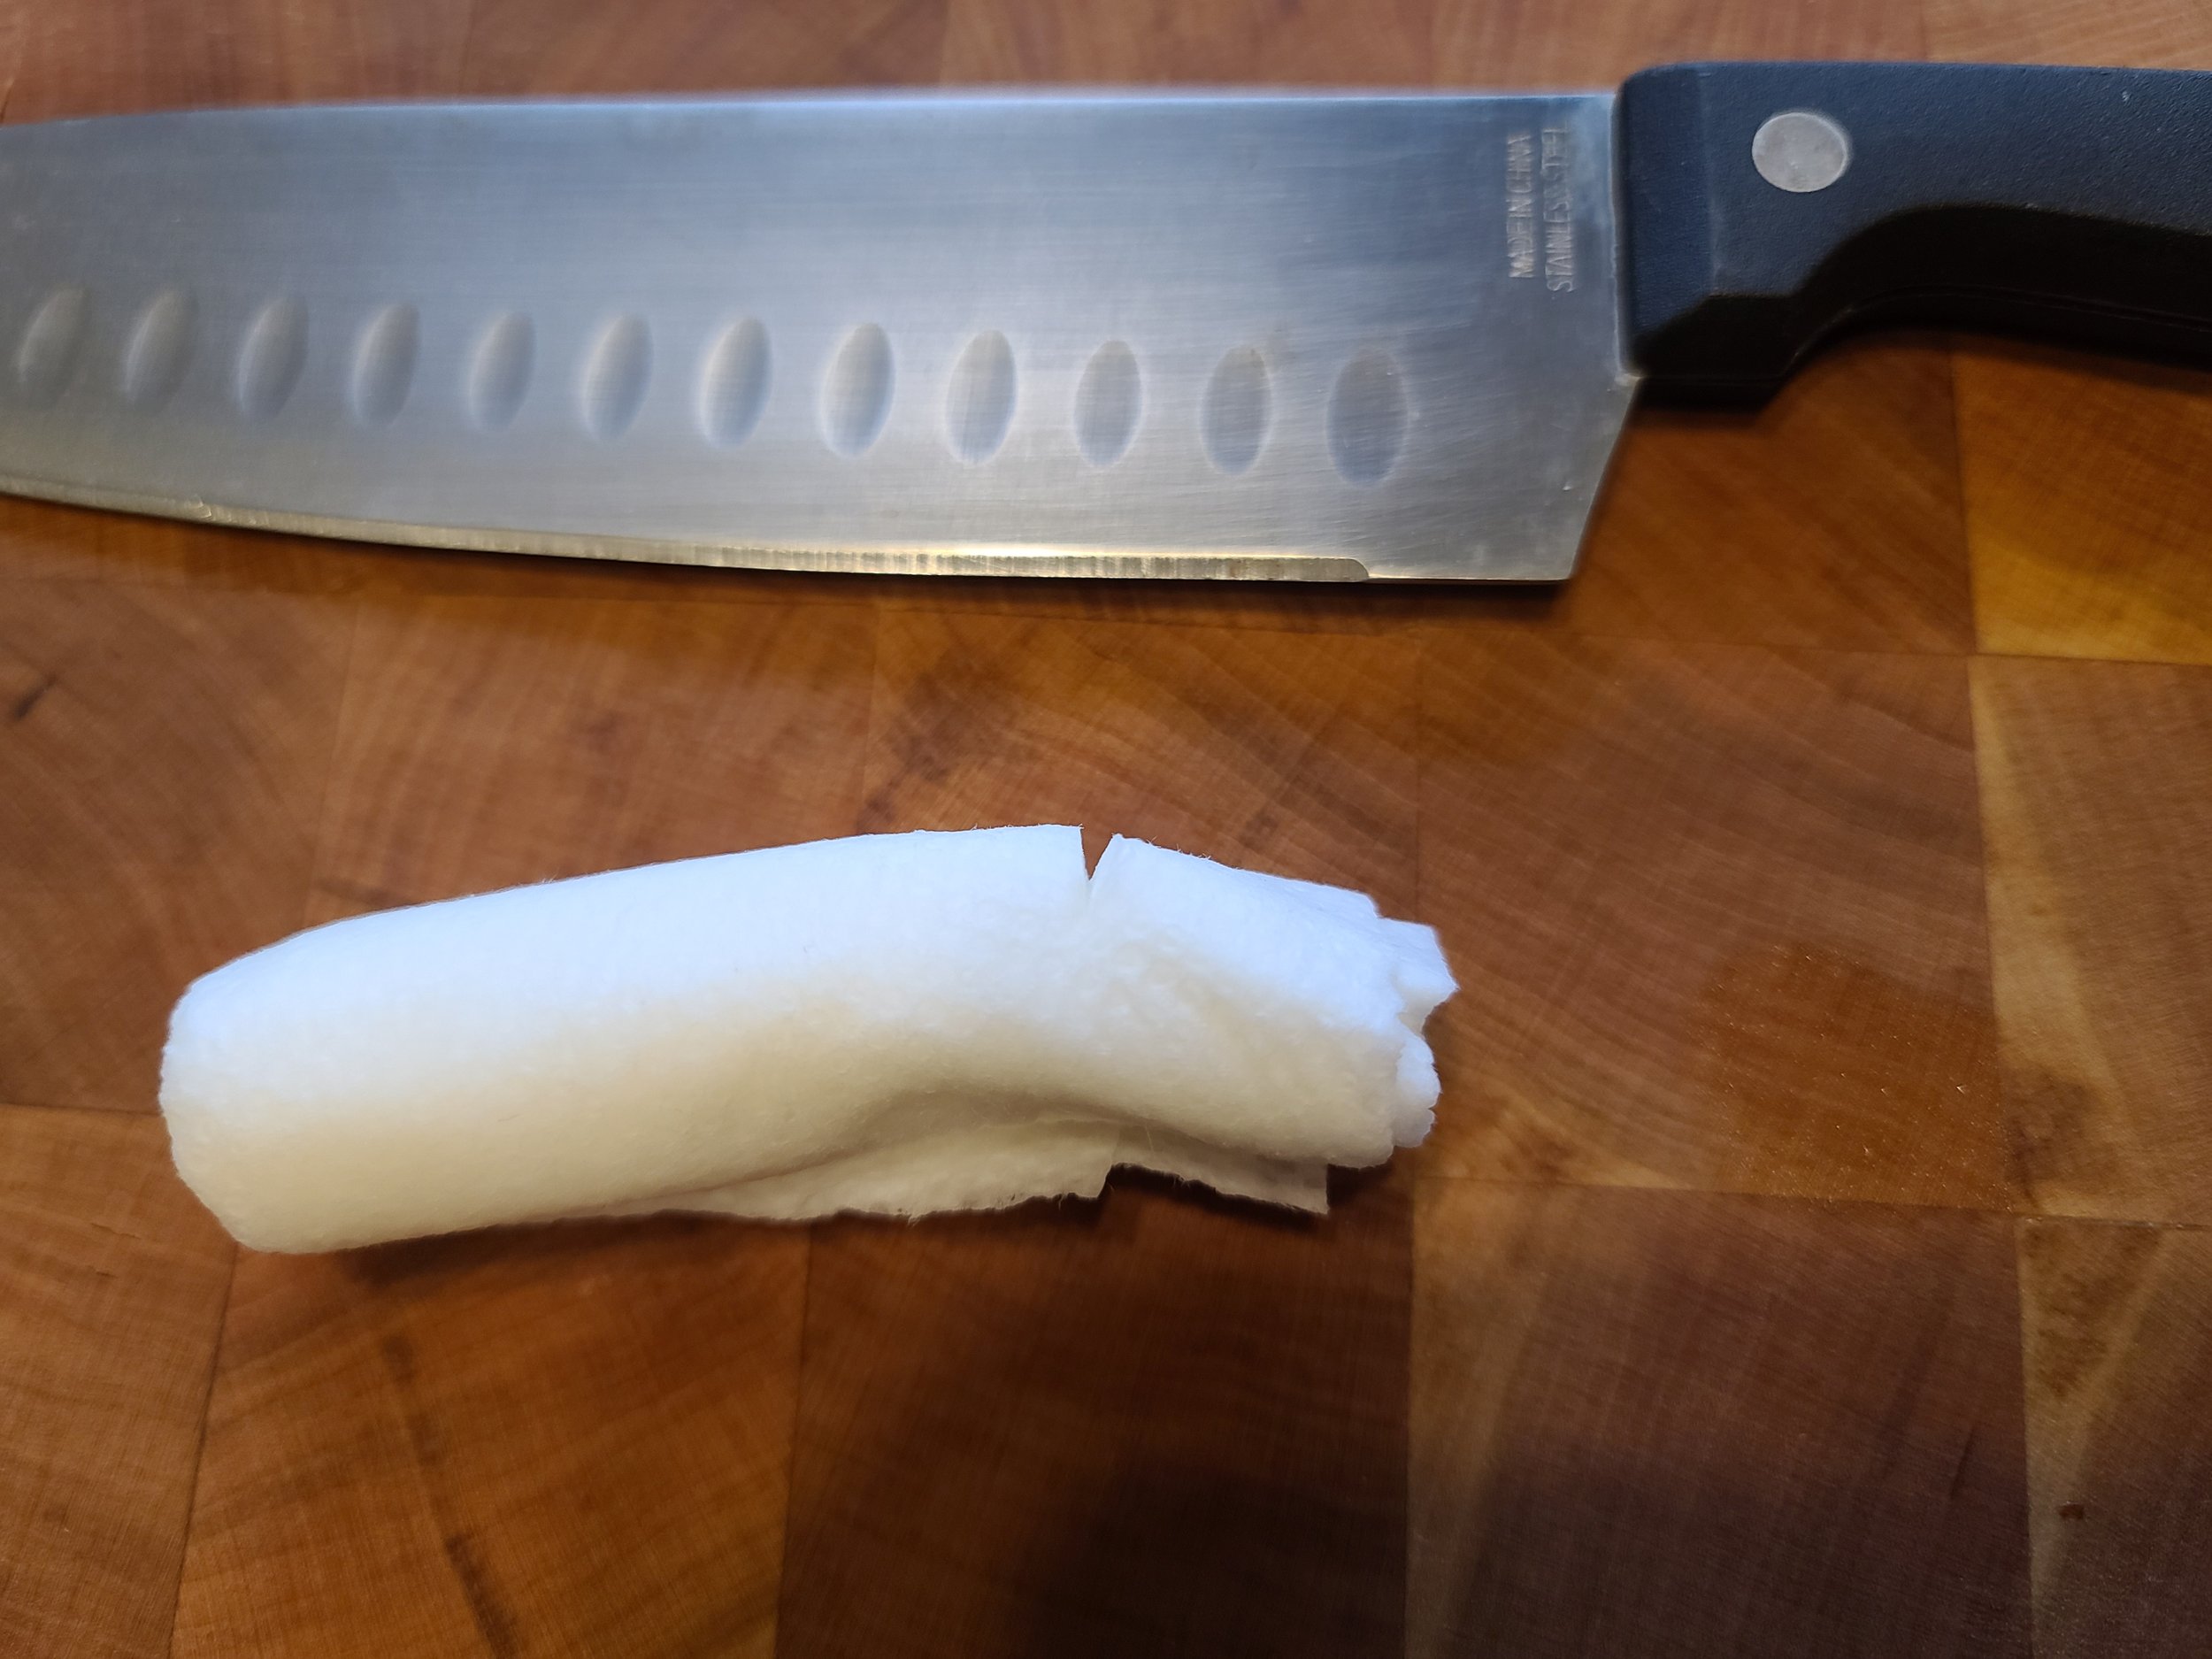
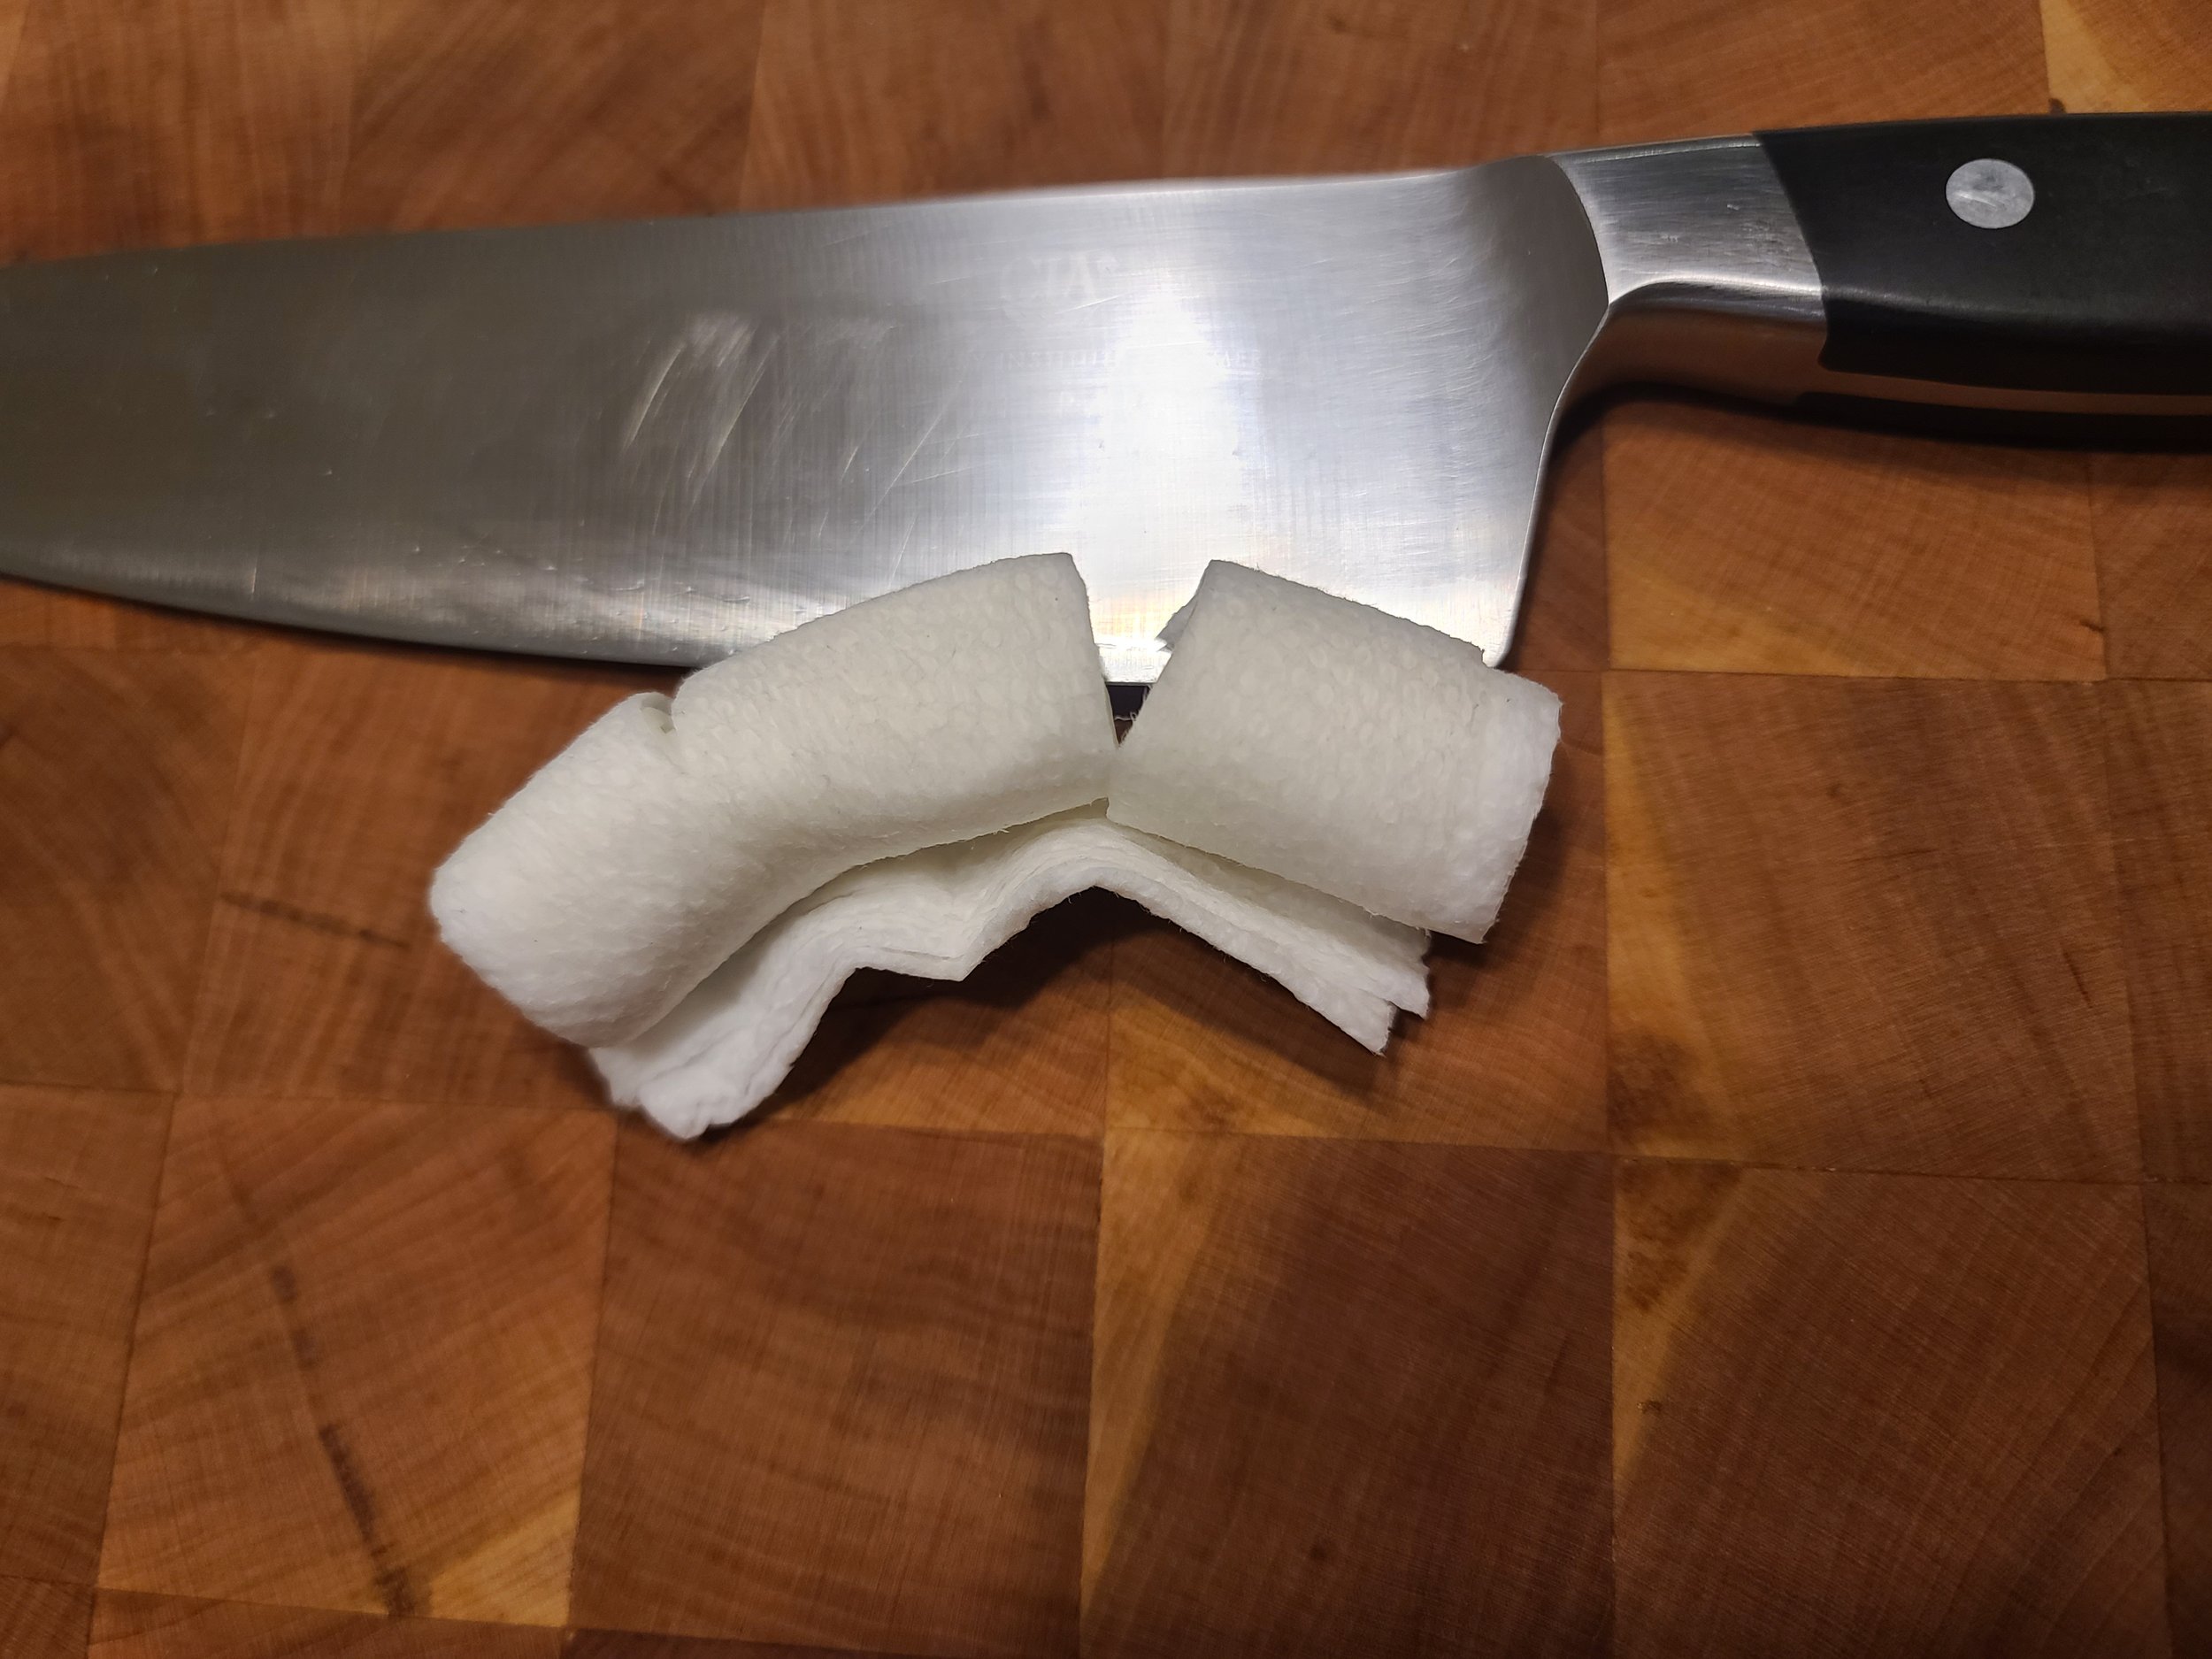
The test is simple. Take a full square of paper tower, fold up, wet, and roll into into about a 3/4” roll. I then do a single slice with fairly light pressure, letting the knife do it’s work. After we sharpen, we’ll test on the same piece on the other half. As you can see, we have a fairly wide range of cut depths. my old knife did the best, the cleaver basically did nothing, and the other 2 were in the middle.
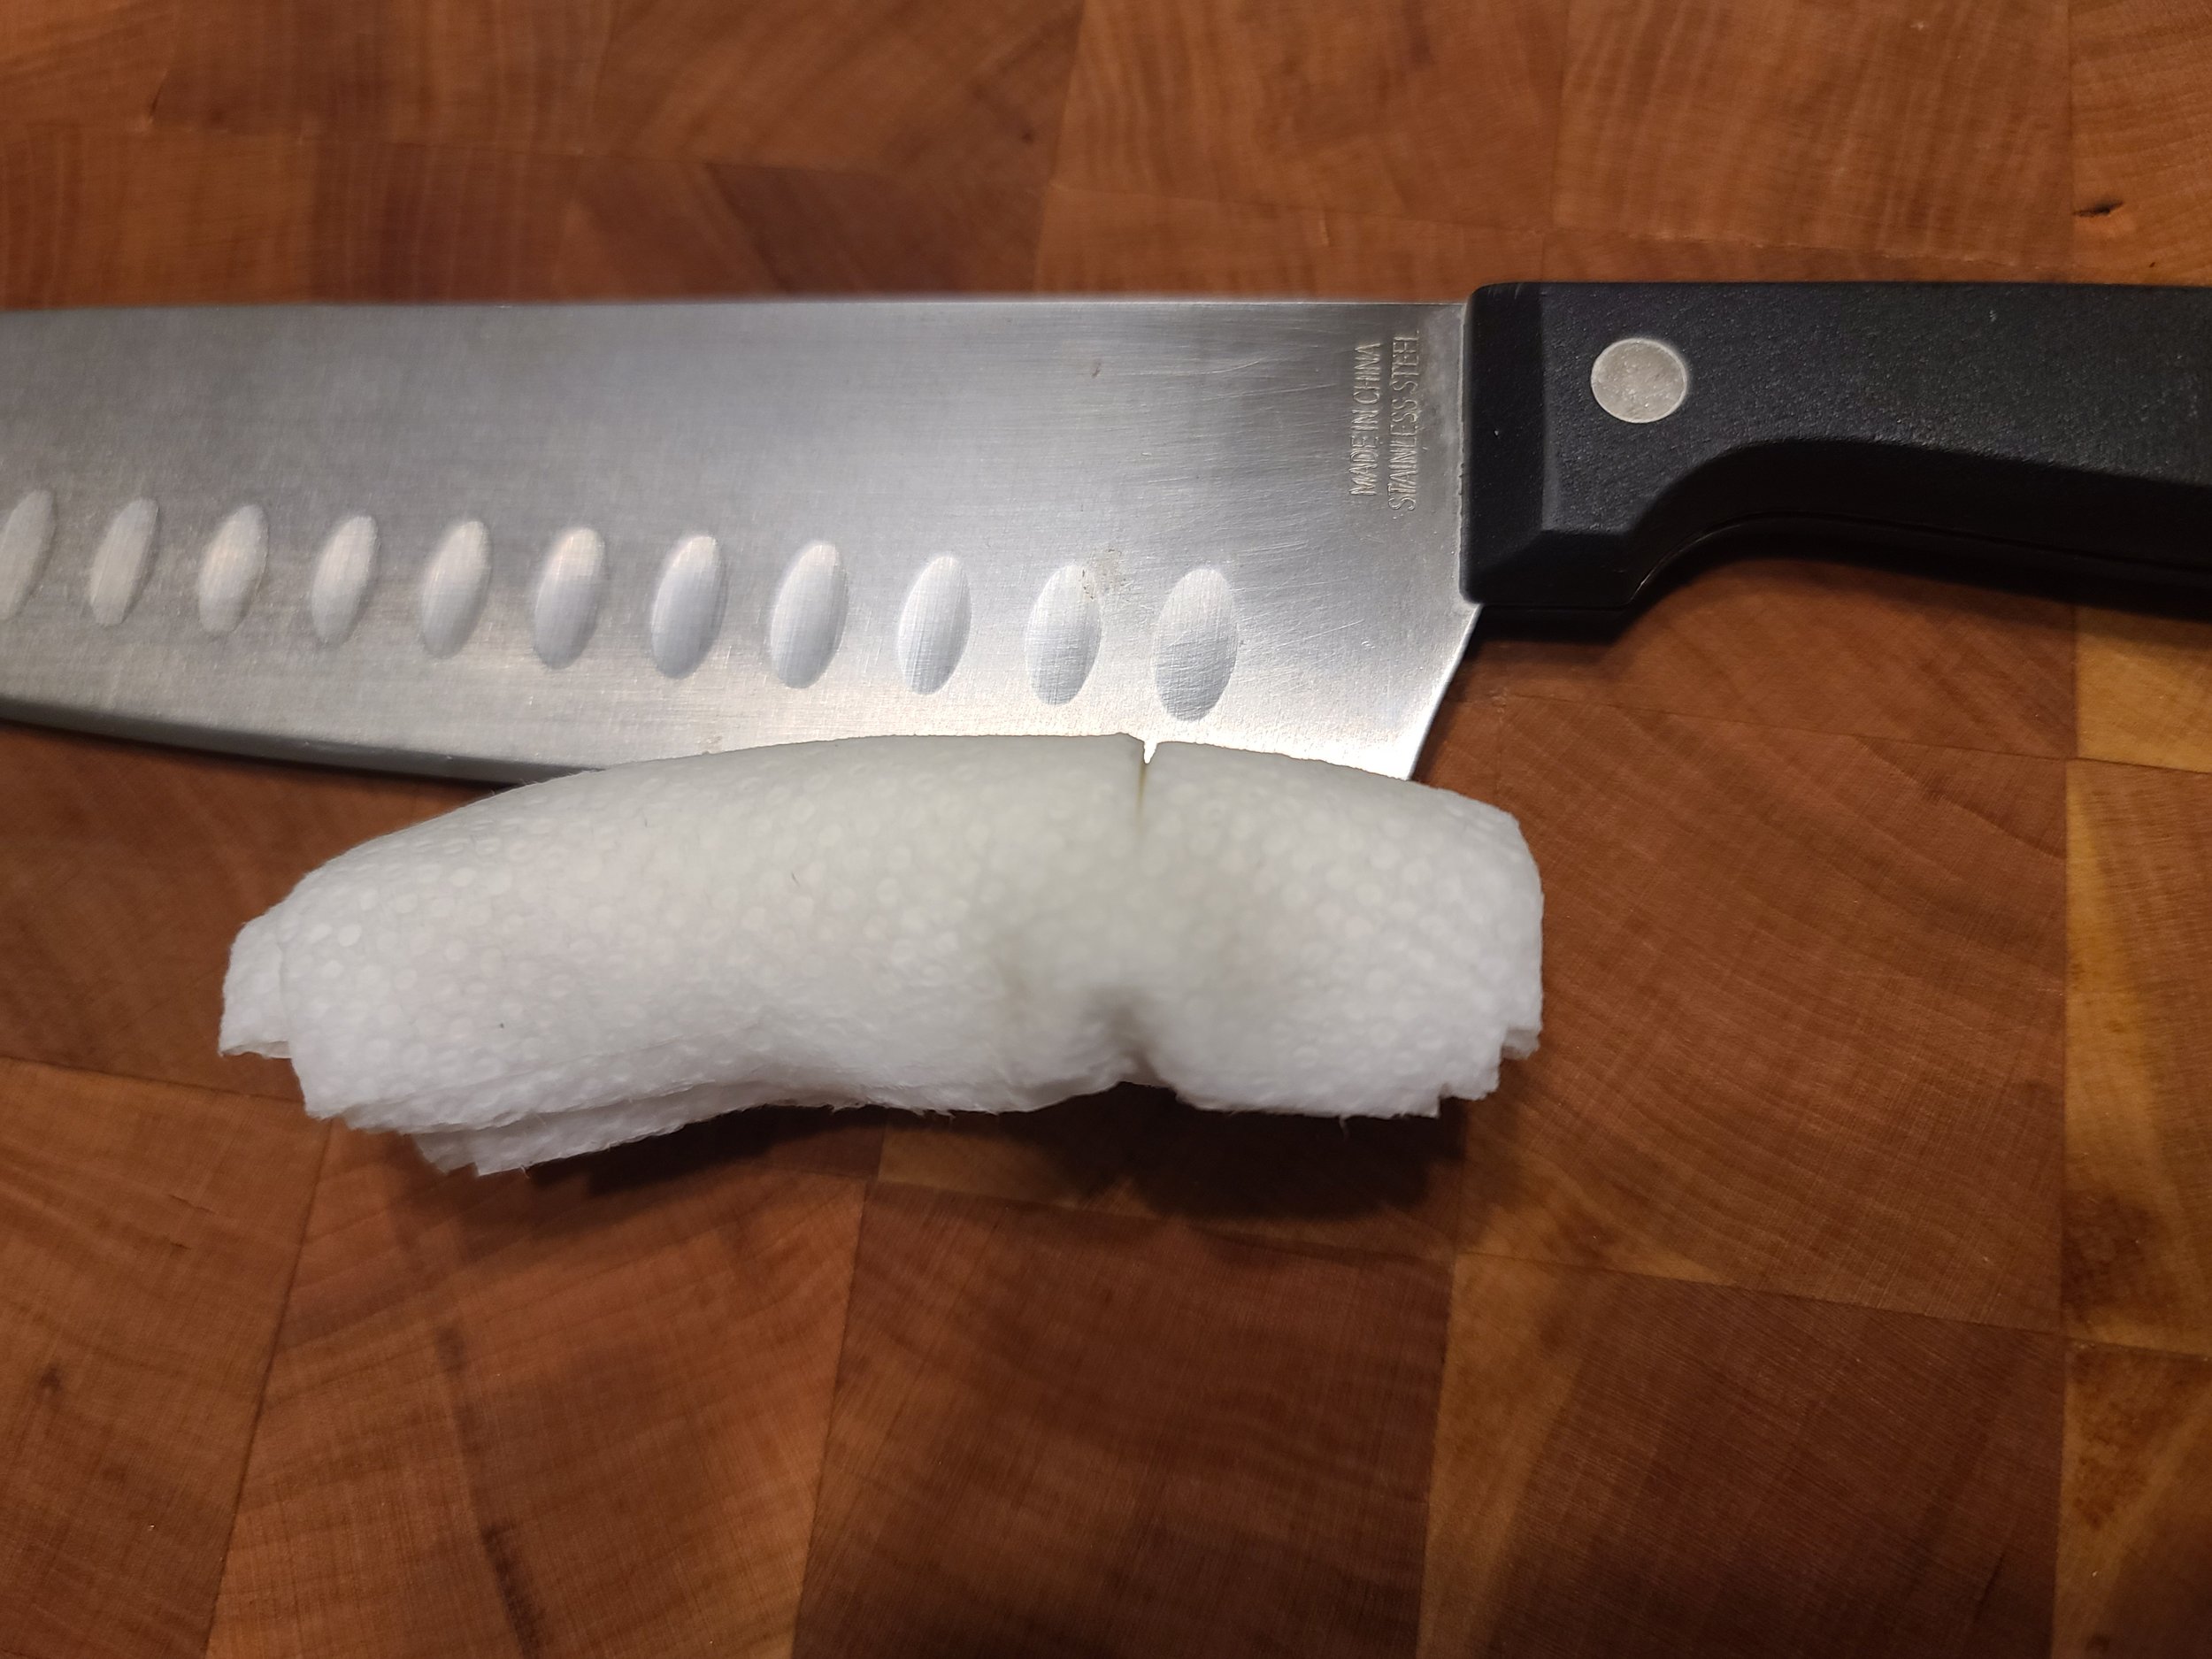
As a control, here is the same test with my current Wusthof knife that I use regularly and hone about once a week.
The Sharpening Process:
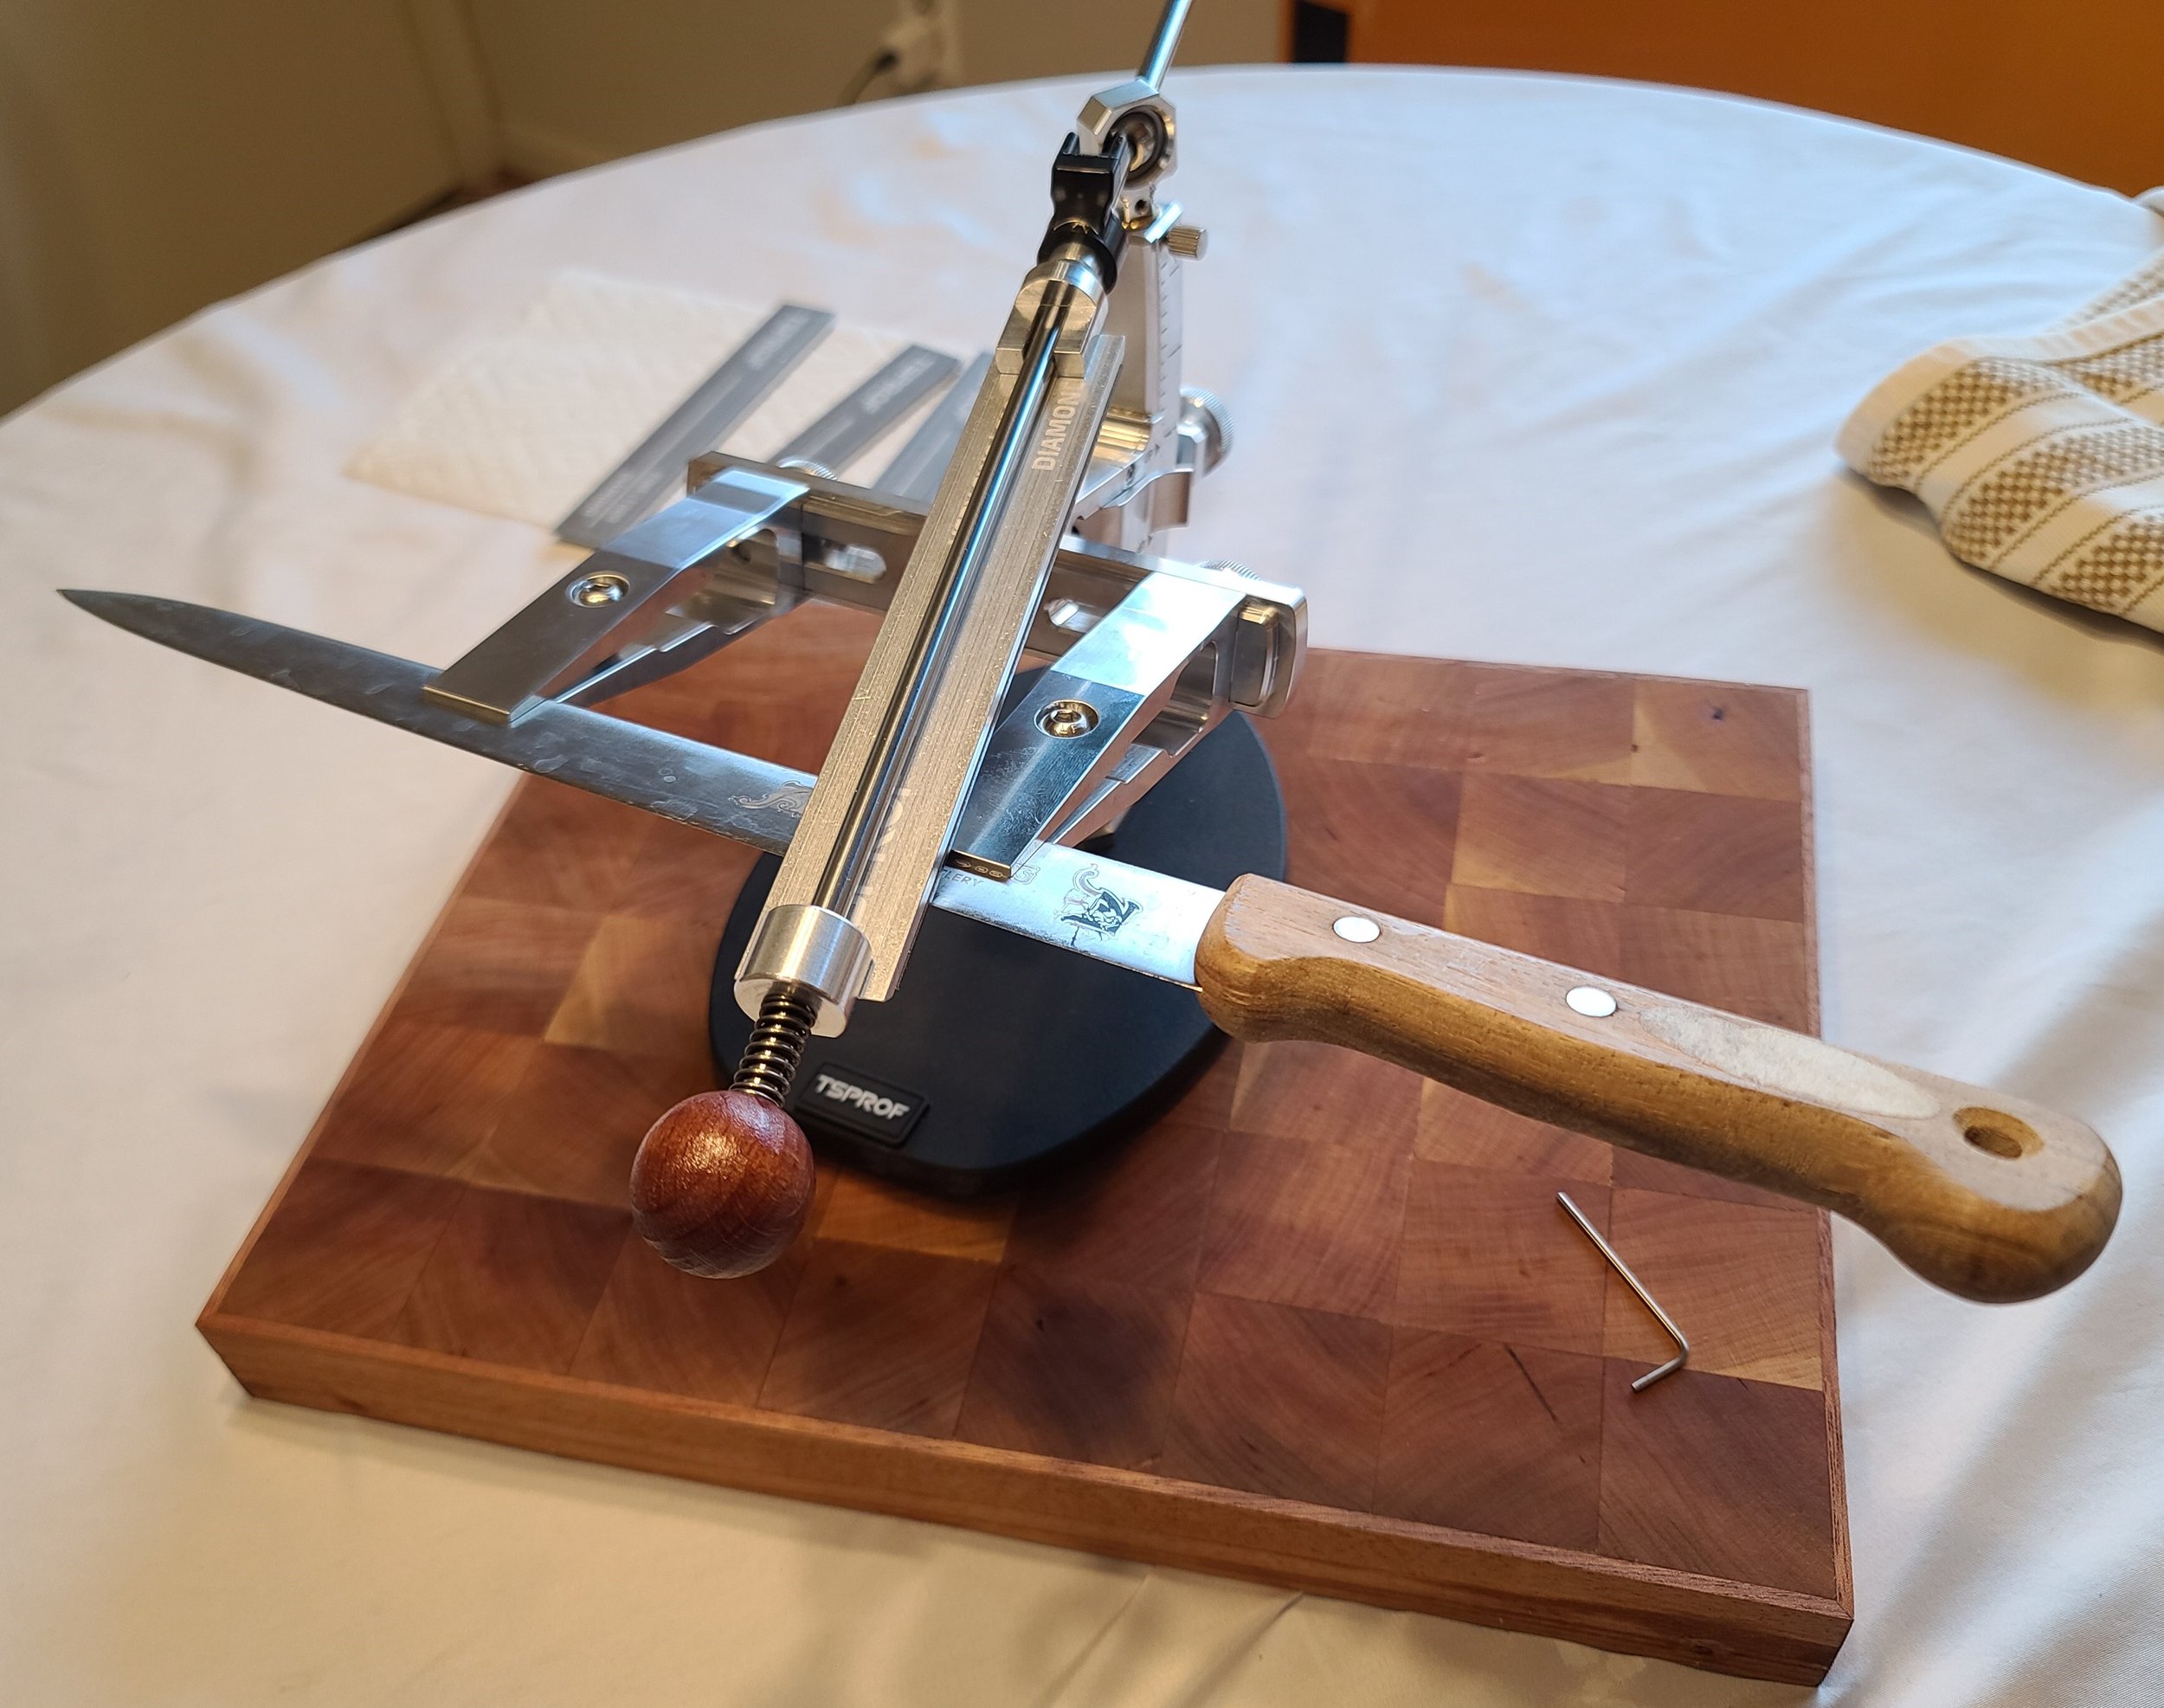
After getting the kit assembled (which did take a bit of effort, as the instructions do have a bit of odd phrasing, mostly due to the fact that English is the second language in the instructions), I used the included Hex key to clamp each knife in place, adjusted the grinding angle by sliding the clamp arm up and down the vertical arm in the back until the arrows line up with the knife shape that you want the bevels to be. It’s fairly straightforward, and the instructions also give you actual angles that you can use with a digital reader if you have one.
If you don’t have a digital reader, we run into the first issue with this kit. Trying to get a knife back to the exact same angle is basically impossible. You only have some etched lines to give you a guide, and if you really want to make sure you get back to the exact same angle on round 2, you’ll need an outside tool.
Once each knife was in place, I used each of the 5 diamond plates to do a fair comparison on each knife. The grits go from 150 to 1000.
The actual sharpening process is a joy to use. It’s almost zen like, just going through the motions of sliding the plate back and forth, but without having to worry constantly about making sure your angles are set perfectly. The machining shows again here, the swivel arm has just the barest bit of resistance so it always feels like you’re in control when you’re sharpening. The switch that opens the lock to spin the knife over has a satisfying little “click” when you use it. After a few minutes of getting used to everything, you can just zone out and let the tool do the work.
The carving knife does have a bit of a flex to it, so that made it harder to sharpen evenly. The kit could possibly use a “long blade” clamping arm available.
One minor quirk, the instructions don’t explain what a burr is when you’re grinding. The kit assumes you know how to sharpen a knife and what you’re looking for to know when to flip the blade. The is very much a kit for professionals.
All in all, I went through all 4 knives in maybe 2-2.5 hours. I honestly lost track of time and was just enjoying the process.
The last step before re-testing was taking each knife to my honing steel for 10 passes on each side, just to give as fair a go as possible.
The Cut Test:
Clearly, the kit works. Each knife has at least some improvement. My old knife nearly cut all the way through the test piece. The slicer did a very good job. The cleaver was a bit of a hassle, as the kit can only go so far to getting that wide of a grind angle, but it clearly did the job. The cheap knife took a while to do, as I had to re-grind an entire bevel into it. Then, when I flipped it over, the second bevel isn’t at the same angle, so there wasn’t as much work to do. Still, it did help, even with having to work with uneven bevels (not the fault of the kit, it’s just a really cheep knife)
One thing to keep in mind, this is a sharpening system, not a grinding system. You really can’t deal with medium and larger nicks with this. It’d take a TON of work to grind a nick or chip out. Tiny ones you can remove, but that’s not what the kit is for.

One issue with the machining is the little plastic “parking bracket” that holds the swing arm in place when it’s at rest, rubs on the base of the pivot and wears off plastic. I don’t think a sharp chamfer was the best idea here. If I keep using this, I’m probably going to take a small round file to it and round off the edges.
Overall thoughts:
The TSPROF Kadet is a professional knife sharpening kit at a professional price. The $375 price point should ABSOLUTELY put off your average home cook. It’s not meant for someone like that. This is for someone who spends hundreds on their knives and wants to get a really nice, consistent edge on them. Are there issues? Yes. Absolutely. You’ll need to replace the plates not too infrequently (you’ll see in the Bonus Test section), but TSPROF doesn’t hide that. A set of 5 plates is like $50, says they’re best for beginners, and even says that this kind of sharpening plate wears out quicker because of what it is. That’s not a major issue. When I forge a knife, I’ll go through a whole set of belts in like 2 or 3 knives. The plates should be seen as consumables. You can buy better ones from them, so learn on the cheap ones, then get good ones.
In order to get a really nice shaving sharp edge, you’ll want to get a strop plate and compound. The plates I used DID get it “shaving sharp”, but it wasn’t exactly a smooth and clean cut.
The process itself and the machining is top notch. It’s super smooth, the machining is tight, tolerances are good. The finish on the aluminum isn’t going to stay shiny for long, but the higher end kit is anodized, so it’ll likely look nicer longer, but we didn’t test that one.
Now the big question, is it worth the cost? If you’re a home cook looking to make your $50 stainless steel knife sharper for when you use it for everything? Absolutely not. Take the money, get a $100 knife, get a stone, learn to sharpen by hand. It’s a good skill to learn. If you don’t want to lean? Then get a cheep knife sharpener from wherever.
But, if you have a couple hundred dollars of knives that you use regularly and you know how to take care of your carbon steel damascus knives and not risk scraping your pattern up? Yes. I honestly think so. Expect to also buy the higher end plates and strop, but for keeping bevels consistent, I haven’t used much better. This is a high end tool at a high end tool price. You might need to take a file and clean up a chamfer or 2, but overall, a nice kit.
If I get some more plates to test, I’ll let report back on their quality as well. In the mean time, I’m going to get back to CAD up a laser cut plywood box to keep the plates in.
~Sean

BONUS STRESS TEST!
After I finished with my knives, I remembered by EDC pocket knife needed a touch up. So into the clamps it went. It’s only about 4” long with about 1.25” cutting edge, so we’re basically at the lower limit for what the Kadet can handle.
As for the steel, it’s W2 and 15n20 random pattern welded and hardened to about 62 Rockwell. W2 is a rather tough steel, so we’ll see how well it does.
An issue I noticed fairly quickly was that I couldn’t get a shallow enough angle to just get the edge ground. I’d need to grind a whole new bevel in. So, I made a cup of tea and got to work. This took AGES to do. The 100 grit steel was already wearing down, so things were going slow. After about an hour, I finally was close enough to the edge to be useable and I was out of patience. I successfully killed the 150 grit plate.
The remaining 4 plates were still useable, and they combined only took maybe 15 minutes.

I couldn’t get the little nicks out of the knife, but at that point, I didn’t care. I had removed a TON of tough steel and it’s a utility knife. The final polishing plates even brought out a bit of the color difference between the 2 steels, so that was nice to see.
Don’t let my wearing down of the steel as that harsh as a criticism though. The Kadet is ABSOLUTELY not meant to re-grind another edge. I expected to just have it not work and then have to go to the belt grinder, but I was pleasantly surprised. I just need to clean up the rest of it and re-etch the whole thing. I’m happy with my new bevel and overall, I’m happy with my time with the Kadet kit.